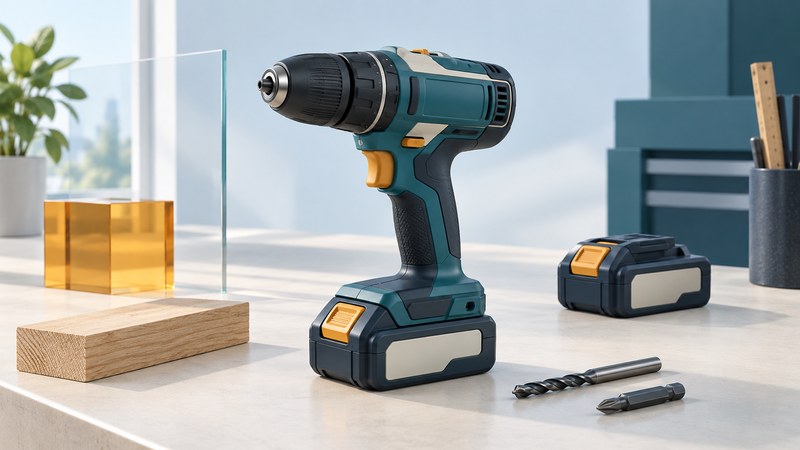
Start with the holes and screws
A useful cordless drill is one you can control comfortably while it handles your actual holes and fasteners. Write down the material, largest hole, screw type and working space before comparing kits. For small household repairs, reach and weight can matter more than a headline torque figure.
| Your work | Feature to check | What to verify |
|---|---|---|
| Furniture and light repairs | Compact drill-driver with variable speed and a clutch | Can you hold it square and reach the fastener with the intended bit? |
| Repeated holes in wood or metal | Material-specific drilling capacity and suitable speed range | Compare the planned bit diameter with the exact tool manual. |
| Masonry holes | A tool and bit explicitly suited to that substrate | Establish whether the job calls for hammer drilling or a rotary hammer. |
| Long periods of use | Balance with the actual battery attached | Try the complete tool; a larger pack changes handling. |
A standard three-jaw chuck holds compatible round or hex shanks within its stated capacity. A quarter-inch hex impact driver and an SDS rotary hammer use different interfaces and actions. Start with the fastening or drilling task, then confirm the tool and accessory combination in their manuals. CCOHS explains matching accessories to drill capacity and material.
Know what each control changes
| Control | Purpose | First check |
|---|---|---|
| Trigger | Varies speed within the selected range | Practice a gentle start on a secured test piece. |
| Mechanical gear | Selects a low or high speed range | Read the manual before moving the selector; let the tool stop. |
| Numbered clutch ring | Limits driving torque at a selected stage | Start low and test; numbers are settings, not calibrated N·m values. |
| Drill or hammer symbol | Selects the operating mode | Use the mode specified for the bit and material. |
| Direction switch | Selects forward or reverse | Confirm direction before engaging the work. |
On the Bosch UniversalDrill/UniversalImpact 18V-60 example, the lower gear is intended for screwdriving or larger drilling diameters, and drilling mode bypasses the torque clutch. Your drill may arrange these controls differently. Treat its numbered clutch positions as trial settings for the joint. A torque-specified assembly needs an appropriate torque tool.
Compare the complete battery system
Record the exact compatible battery and charger models, what the box includes and whether the tool is sold bare. A low tool-only price can leave both power components to buy. Check compatibility in writing before choosing a pack or adapter; similar shape or voltage labeling does not establish a supported combination.
Ampere-hours describe battery charge capacity. Compare runtime claims only when the tool, load, pack and test conditions are comparable. For a practical comparison, ask how many of your intended holes or screws one supported pack completes, how long charging takes and how much the assembled tool weighs. Keep charging and storage within the manufacturer’s instructions; inspect the pack for damage before use.
Make a small, controlled first test
- Read the drill and accessory instructions. Wear suitable eye protection, secure loose hair and clothing, and clamp the workpiece. Check both sides of the planned hole and establish what lies behind a wall before drilling.
- Remove the battery before fitting or changing a bit. Seat the shank correctly, tighten the chuck and remove any chuck key. Use an auxiliary handle whenever the manual requires it.
- For an ordinary screw joint, choose the correct bit type and size, select a low driving setting and try an equivalent scrap assembly. Increase the setting gradually if the screw stops early. Check the finished joint after each trial.
- For a hole, choose the bit, mode and speed guidance for that material and diameter. Keep a stable stance and both hands clear of the drilling path.
- Stop if the bit jams, the work moves or the tool behaves abnormally. Disconnect the battery before investigating.
These setup checks follow CCOHS drill guidance; the tool manual supplies its operating limits. Choose hearing protection for the actual noise exposure using the hearing-protector guide.
Use the result to choose the next check
- Bit slips in the screw: stop before damaging the recess; compare both bit profile and size with the fastener.
- Hole wanders or cuts poorly: check bit condition, seating, material suitability and work support. The drill-bit guide explains those choices.
- Tool stops or gets unusually hot: follow its overload instructions and check capacity, battery condition and accessory selection before continuing. Repeated stalling is a reason to reassess the setup.
Choose your next guide
- Drill Bits — Check the material, hole shape and shank before choosing a bit.
- Hammer Drills — Distinguish ordinary drilling, screwdriving and percussion modes.
- Cordless Screwdrivers — Choose reach and control for small screws and household assembly.
Browse drilling and holemaking or explore all 47 tool guides.