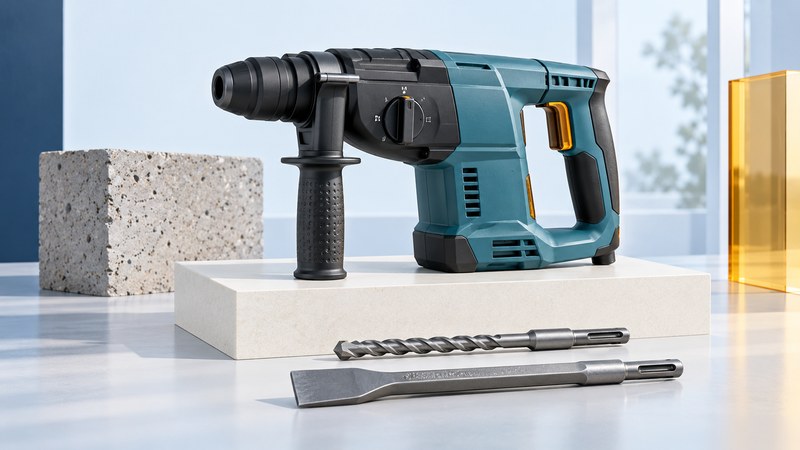
Define the hole before choosing the tool
Write down the substrate, hole diameter, depth and number of holes. Add the working position and whether the hole supports a specified anchor. These details make a useful buying or rental brief. For anchoring, use the anchor maker’s requirements for the actual substrate, including hole preparation; tool capacity alone does not establish a suitable fixing.
| Task | What to check | Decision to make |
|---|---|---|
| Concrete or masonry holes | Required diameter and depth; tool’s recommended working range | Choose a rotary hammer and bit intended for that material. |
| Removing tile or light chiseling | Chiseling capability, accessory and duty limits | Confirm the model offers impact without rotation. |
| Wood or metal holes | Permitted chuck, bit and rotation-only operation | An ordinary drill-driver may be the simpler choice. |
| Large cores or repeated heavy work | Approved core size, drive system and operating method | Obtain equipment and training for the specified job. |
A hammer drill and a rotary hammer are different tool types. Compare their stated applications and drilling ranges instead of relying on the word “hammer.” The Bosch GBH 2-26 specification, for example, distinguishes its optimum concrete drilling range from its maximum capacity. Use that distinction when comparing repeated work with an occasional hole.
Match the shank and operating mode
SDS-plus and SDS-max identify different accessory interfaces. Buy the shank system listed for the tool; check any approved adapter and its permitted operation separately. A conventional drill chuck or adapter can have restrictions that the SDS holder does not.
The Bosch GBH 2-26 family manual (PDF) distinguishes hammer drilling, rotation-only drilling and, on applicable versions, chiseling. Its chisel-position setting is for alignment. Identify the symbols and supported modes in your exact manual before starting. Change modes only with the tool stopped, as instructed.
With the power disconnected, inspect and fit the accessory using the manual’s insertion and retention check. Fit the auxiliary handle and depth stop where required. Plan to hold the tool securely with both hands; a clutch reduces some reaction hazards but still requires correct handling. CCOHS drill guidance covers securing work, appropriate accessories and checking for hidden services.
Arrange dust collection before the first hole
Concrete and masonry drilling can release respirable crystalline silica. For U.S. construction work, OSHA’s handheld-drill fact sheet (PDF) describes the Table 1 dust-collection approach: a compatible shroud or cowling, the manufacturer’s specified airflow or greater, a filter at least 99 percent efficient and a filter-cleaning mechanism. Hole cleaning requires a HEPA-filtered vacuum under that approach.
Select the entire system, including hose and collection bags, and follow its maintenance instructions. Keep the hose clear and check that the shroud can work at the required hole location. Ordinary visible dust pickup is insufficient evidence that a system meets those requirements. The employer must establish the applicable exposure-control approach; chiseling needs its own assessment.
Include collection-system reach and clearance in a rental request. Ask the supplier to identify the supported tool, accessory and extraction combination in writing, and bring the planned hole dimensions.
Use a short setup record
- Identify the substrate and establish the position of hidden wiring, pipes and other services. Stop if the safe drilling location is uncertain.
- Record the required hole dimensions and installation specification. Check that the bit has sufficient working length and belongs to the correct system.
- Inspect and connect the dust controls before work. Wear suitable eye and hearing protection and any respiratory protection required by the exposure assessment.
- Set the handle, depth control and mode according to the manual. Use secure footing and controlled feed pressure; let the machine do the cutting.
- Stop on binding, abnormal movement, damaged equipment or loss of dust collection. Disconnect power before investigating or changing accessories.
Compare the usable kit and the rental option
Price the tool together with bits, required handle, compatible extraction and consumables. For cordless equipment, confirm battery and charger compatibility and compare weight with the intended pack fitted. For occasional work, a rental with the correct accessories and a demonstration can be more useful than an incomplete purchase.
Save the model and bit numbers, settings and dust-system maintenance notes. Use the drill-bit guide for material and shank checks, and the hearing-protection guide to plan protection that fits with the rest of the equipment.
Choose your next guide
- Cordless Rotary Hammers — Plan batteries, charging and the weight of a complete drilling setup.
- Hammer Drills — Distinguish ordinary drilling, screwdriving and percussion modes.
- Drill Bits — Check the material, hole shape and shank before choosing a bit.
Browse drilling and holemaking or explore all 47 tool guides.