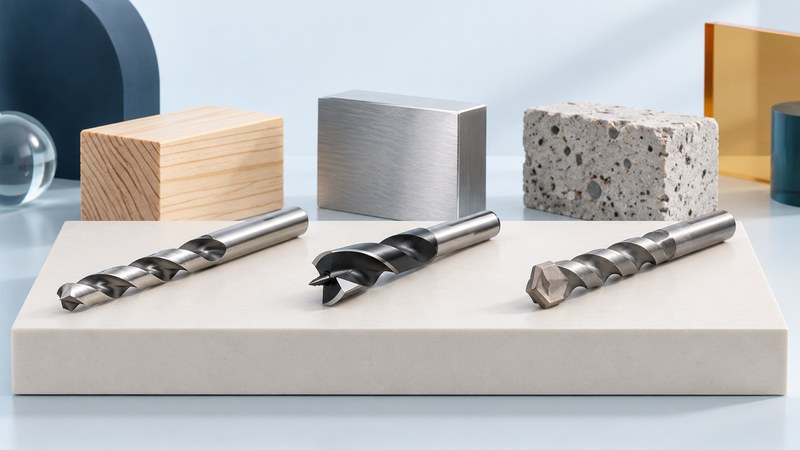
Choose for the material and the hole
Start with four facts: material, finished hole diameter, required depth and the tool that will hold the bit. A screw pilot hole, a clearance hole and an anchor hole serve different purposes. Copy the dimensions from the fastener or fitting instructions before buying a set.
| Material or task | Bit family to investigate | Important limit |
|---|---|---|
| Wood: accurate small holes | Brad-point wood bit | Check working length and support at the exit. |
| Metal | HSS twist bit rated for the specific metal | Material, diameter and cutting conditions determine speed. |
| Stainless steel | A bit explicitly rated for stainless, such as suitable HSS-Co | Heat resistance alone cannot compensate for poor setup. |
| Masonry or concrete | Carbide-tipped bit rated for the substrate and drilling action | Match chuck/SDS interface and drill mode. |
| Tile or porcelain | A bit specifically rated for that tile | Follow its instructions for impact, cooling and starting. |
Bosch’s material guide explains these broad families. Its HSS-Co bit information identifies cobalt-alloy high-speed steel for stainless and other metals. Read the product’s application list: bit color alone cannot tell you which materials or modes it supports.
Separate hole diameter from shank size
The cutting end makes the hole; the shank fits the tool. A reduced-shank bit can make a hole larger than its shank, so fitting inside the chuck is only one compatibility check. The drill’s rated capacity must also cover the operation. Confirm the bit’s useful cutting length, not just its overall length.
A round shank, a quarter-inch hex shank and an SDS shank have different mounting requirements. For an impact driver, check that the accessory is specifically approved for that action. For a rotary hammer, match the exact SDS interface. A loose or improvised fit creates a problem before drilling begins. CCOHS recommends properly seated accessories that run true.
Use speed guidance for the actual combination
A bit needs a speed suited to its diameter and the material. DEWALT’s drill-bit speed reference provides separate recommendations by material and bit size. Use the guidance for the particular accessory when supplied, and keep within the drill’s limits. A trigger with no speed readout requires care; a published RPM value is not a clutch-ring number.
As an illustration of why diameter matters, at the same RPM a cutting edge twice as far from the axis travels twice as fast. That relationship explains why a single maximum-speed setting is a poor default for every hole. It does not supply a cutting-speed recommendation for an unknown bit or material.
Follow the accessory maker’s requirements for lubrication or cooling. Stop to reassess if cutting deteriorates, the bit becomes discolored or material begins to melt. More force can hide a poor match until the bit or workpiece fails.
Set up the work before starting
- Identify the material and inspect the drilling path, including concealed services. Obtain the fastener or anchor instructions and confirm diameter and depth.
- Inspect the bit and tool. Remove power before changing the bit; seat and tighten it as the chuck instructions require.
- Clamp small work securely, provide appropriate support and wear eye protection. Keep hands away from both the cutting path and exit.
- Choose the instructed mode and speed. Stop and isolate the tool before freeing a jam or changing the setup.
See CCOHS powered-drill precautions for workholding and jam handling. Concrete and masonry work also needs a dust-control plan appropriate to the task; consult the tool/extraction instructions and applicable workplace requirements before starting.
Diagnose the symptom before replacing the drill
| Symptom | Check first | Useful next step |
|---|---|---|
| Bit wanders | Tip condition and suitability; stable starting surface | Try a correctly matched sharp bit on a secured sample. |
| Ragged exit in wood | Support behind the exit and feed near breakthrough | Test with suitable backing on scrap. |
| Bit spins but cuts poorly | Rotation direction, material rating and worn edges | Correct the mismatch before adding pressure. |
| Oversized or uneven hole | Runout, bent bit, loose chuck or moving work | Stop; correct seating or replace damaged components. |
| Anchor does not fit | Specified bit diameter and hole-cleaning procedure | Return to the anchor instructions; avoid improvising a larger hole. |
Buy the sizes that serve repeat jobs, then replace worn individual bits. A large assortment adds value when its applications, dimensions and replacements are clear. Store bits so cutting edges stay protected and identification remains readable.
Choose your next guide
- Cordless Drills — Match drilling capacity, gears and clutch settings to the job.
- Drill Presses — Plan supported, repeatable holes with a stationary drill.
- Rotary Hammers — Compare accessory interfaces, drilling modes and dust control.
Browse drilling and holemaking or explore all 47 tool guides.