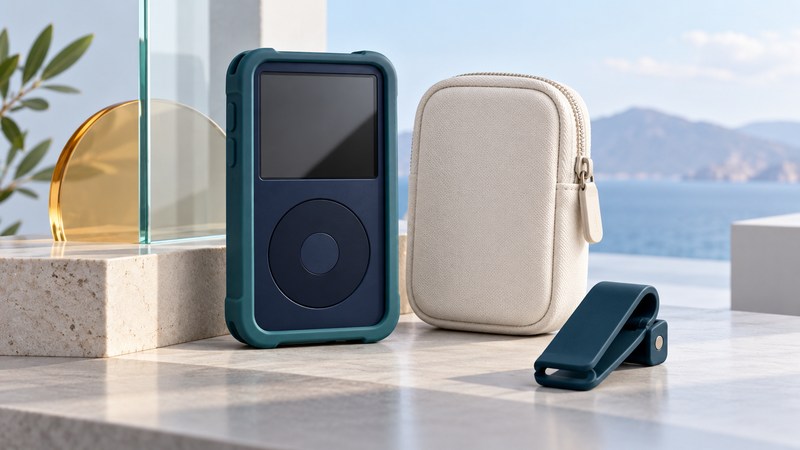
Choose an iPod case by matching the exact player, checking access to its controls and connectors, and deciding which everyday exposure you want to reduce. A thick bumper can be useful, but “rugged” is a description that needs supporting detail. Fit, handling and a sensible carrying routine are checks you can make without dropping or soaking the player.
Match the case to the complete model description
Use Apple’s identification reference before trusting a generic “classic” or “fourth-generation” label. Apple identifies the monochrome Click Wheel iPod as A1059, while iPod photo/color-display variants use A1099. Record the capacity, ports and enclosure details as well; a broad family name does not establish a case’s precise fit.
Check the case maker’s compatibility wording against those details. If the packaging or listing omits the variant, ask for measurements or a fit confirmation for your exact player. For a used case, inspect the actual item: stretched corners, torn openings or a loose clip change its usefulness even when the original model listing was correct.
The iPod mini and nano families need their own identification checks. A similar circular control wheel is only one visible feature, and a case that can be stretched over a player may still obstruct a port or press on a control.
Make a gentle fit and access check
Start over a clear, soft surface with the player disconnected. Follow the case maker’s insertion method. If fitting requires substantial force or bends the player, stop and recheck the model. Then perform the checks below with the cables and headphones you actually use.
Scroll sideways on a small screen to read the complete checklist.
| Area | Check | Useful result |
|---|---|---|
| Screen and wheel | Read the display, scroll a menu and press each control gently. | Edges stay visible and controls respond without sustained pressure from the case. |
| Hold switch | Move the switch through its normal travel. | You can deliberately lock and unlock the controls. |
| Headphone port | Insert the intended plug normally and listen to a familiar track. | The plug seats fully without its housing colliding with the case. |
| Dock connector | Check cable access and release-button clearance. | The cable connects and releases without pulling on its wire. |
| Corners and clip | Inspect retention and the closed clip over the soft surface. | The player stays seated during ordinary handling and the clip closes fully. |
Repeat a control or audio check with the case removed if behavior changes. If a headphone plug works bare but sits partly out with the case fitted, the case opening is a concrete lead to investigate. Forcing the plug risks replacing a fit problem with connector damage.
A speaker dock adds another physical constraint: the covered player must fit the dock’s documented insert and connector arrangement. Remove the case when the dock instructions require it. Use the SoundDock guide to check the audio and charging side separately.
Match protection claims to the exposure
List the situation you are solving: keys rubbing the finish in a bag, accidental button presses in a pocket, or a player slipping from a hand. A dedicated pouch, usable hold switch and a secure grip address different problems. Choose the feature that serves your situation, then check whether it remains convenient enough to use consistently.
If a case claims tested water or impact protection, look for the exact model, test conditions, required closures and exclusions in its documentation. Treat an undocumented claim as an unanswered question. A port opening or cosmetic cover should not be assumed to seal the whole player. Household drop or immersion trials are destructive ways to investigate that uncertainty.
The iPod mini manual’s handling guidance (PDF), pages 58–60 is one model-specific example: it warns about wet locations and temperature extremes. Follow the matching manual for your own iPod. A new outer case does not replace the player’s operating limits.
Keep the contact surfaces clean and the carrying routine simple
Remove the case periodically using its instructions and look for trapped debris and worn edges. Clean the case according to its manufacturer; clean the player separately. Apple’s iPod cleaning instructions call for disconnecting cables, switching off and using a soft, slightly damp, lint-free cloth while keeping moisture out of openings. Follow the instructions for the particular iPod model and avoid abrasive cleaners.
Charging also deserves attention. Apple’s battery guidance advises removing a case if the device becomes hot while charging. Keep a charging routine that allows you to notice the player’s condition, rather than enclosing it in a packed carrying pouch.
Before leaving, check the closure, clip and cable routing. Keep keys and other hard objects in a separate compartment, and leave enough headphone-cable slack for normal movement. After a fall or other incident, inspect the case and player before relying on them again. Record any change in fit, controls or sound; the player inspection checklist can help document it.
Explore Music Players
Browse music-player guides and earlier reporting, or follow the offline-library setup guide. Primary documentation is linked alongside the guidance. Sources and model details checked October 7, 2026.