Updated October 9, 2026
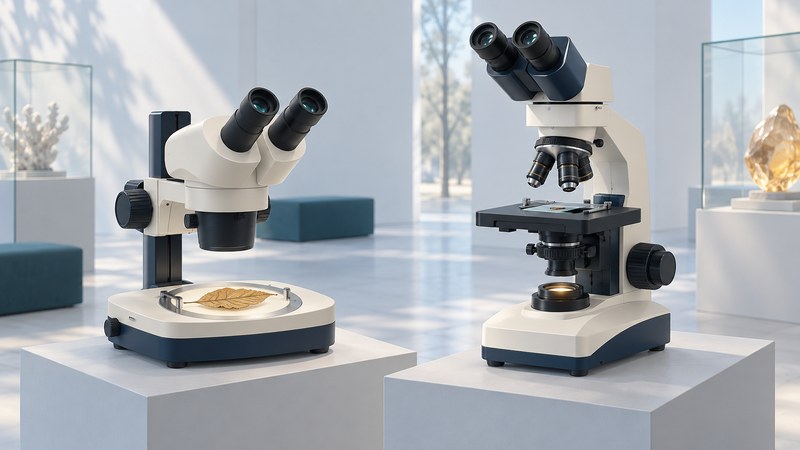
The useful clues in a microscope picture are the objective’s position, space around the specimen and route to your eyes or a camera. These four schematic layouts help you recognize common types. Their capabilities overlap: a digital camera can be added to several optical designs, and the same research stand can support more than one contrast method.
Recognize four common layouts
The drawings simplify the equipment to show its arrangement. They are original explanatory schematics, not scale drawings, optical ray traces or product specifications.
1. Stereo microscope
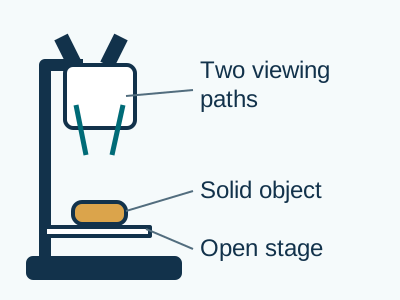
Typical task: inspect a leaf, small component or other solid object with room to handle it. A stereo microscope gives the eyes different views of the specimen, supporting a sense of depth.
Check: working distance, field of view, illumination and available support. Two eyepieces alone are insufficient to identify a stereo design: a binocular compound head commonly splits one image between the eyes.
2. Upright compound microscope
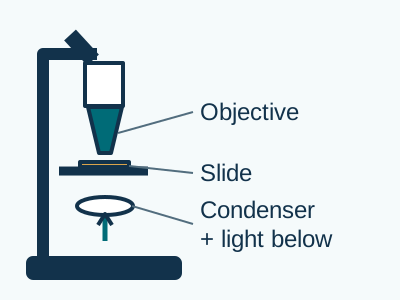
Typical task: study a thin prepared slide using an objective selected from a turret. The optical system combines objective and viewing optics to form the enlarged image.
Check: objective specifications, condenser, supported contrast methods and camera route. Some upright systems use reflected illumination for opaque specimens; the stand’s outline does not specify the light path.
3. Inverted microscope
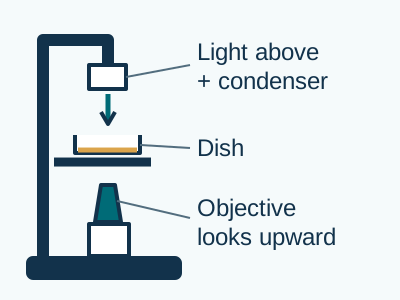
Typical task: view suitable specimens through the bottom of a dish or other compatible vessel. Inverted configurations also serve materials applications with appropriate illumination.
Check: vessel-bottom material and thickness, objective working distance, holder clearance and optical compatibility. A culture dish fitting on a stage is only the first part of compatibility.
4. Digital inspection microscope
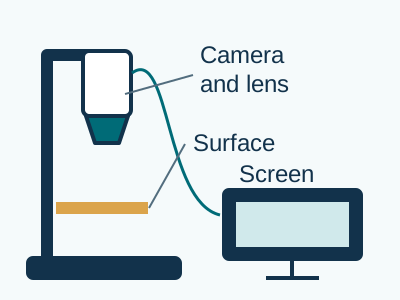
Typical task: inspect and document a surface on a shared display. A supported camera head can be more repeatable than a handheld view; available optics and software vary widely.
Check: saved-image field of view, detail, stand stability, measurement calibration and software support. “Digital” describes the capture/display route and can also apply to a camera-equipped stereo or compound microscope.
Nikon’s stereomicroscopy introduction explains the distinct viewing paths. Leica’s widefield introduction illustrates upright and inverted arrangements and the difference between transmitted and incident illumination. Its measurement-microscope overview describes digital capture and calibration requirements.
Read a product picture in three passes
- Locate the specimen. Find the stage, slide or dish. Determine which side the objective views from and whether there is room for the intended object and holder.
- Follow observation and illumination separately. Identify eyepieces or camera and the possible light source. A camera on top does not by itself identify brightfield, fluorescence or confocal capability.
- Write down what remains unknown. Obtain the model manual or configuration list for objectives, accessories, illumination, dimensions and supported software. Ask which pictured components are included in the offered configuration.
Use the microscope parts diagram to identify controls and the optical-sequence diagram to follow light through a compound microscope. A photograph can show a focus knob while leaving its precision and travel unspecified.
Match the layout to something you want to see
These are starting points for evaluation, not product rankings. Before buying or booking time, ask to see a representative specimen at the required field of view, save an image and confirm that the features relevant to your task are distinguishable. The advanced light-microscopy guide compares contrast methods, while the portable inspection guide helps plan work around large or installed objects.
Explore the Microscopes library. Sources are linked beside the explanations they support.