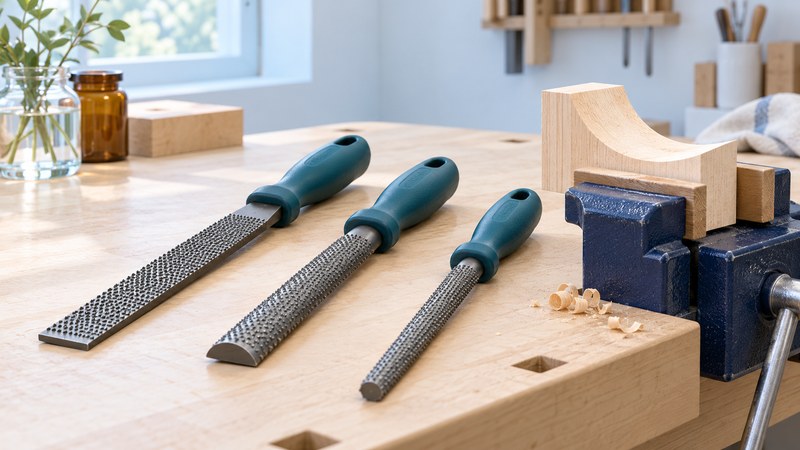
Choose the surface that meets the wood
A wood rasp removes material with individual raised teeth. It is useful when a sawn outline needs a smoother curve, a rounded edge needs shaping, or a small wooden part needs local fitting. Start with a visible target: a pencil line, a template or the mating part. Keep enough material for the later smoothing stage.
| Profile | Useful contact | What to watch |
|---|---|---|
| Flat | Broad faces and outside curves | Keep the tool supported so the edge stays square when required |
| Half-round | An inside curve, with a flatter face for other surfaces | Choose a curve that enters the recess without forcing the edges |
| Round | A small concave feature or round opening | Check the opening frequently so it stays in the intended position |
| Fine detail rasp | A small local correction | A narrow contact removes material from a concentrated area |
Crescent Nicholson’s file-selection guide (PDF) distinguishes coarse wood rasps for stock removal from finer cabinet rasps for fitting. Choose shape, tooth cut and usable length together. A coarse tool can leave enough texture that the smoothing allowance matters.
Mark and support the part
Draw the intended outline on the faces that let you check it. For a curved edge through a board, marks on both faces help reveal an unwanted bevel. Identify which face or edge must remain untouched so it can serve as a reference.
Secure the work in a vise or suitable clamps, with protective pads where needed. Place support close enough to the working area to reduce vibration while leaving the stroke clear. Reposition the clamp as the shape develops; a comfortable starting position may become awkward near the end.
CCOHS hand-tool guidance calls for sound tools, secure handles and supported work instead of holding stock in the palm while cutting. Inspect the rasp’s handle and teeth, wear appropriate eye protection and keep the stroke clear of your body. A loose handle needs correction before use.
Use a short trial to read the grain
Try the chosen rasp on an offcut of the same wood. Use its intended cutting direction and enough pressure for a controlled cut, then ease or lift it on the return. Keep your supporting hand away from sharp teeth. Begin with short strokes where the grain or access is uncertain.
Observe the surface after a few strokes. If fibers lift or an edge starts to splinter, stop and change the approach: support the vulnerable edge, work toward supported material, or use a finer tool. Progress should leave an inspectable surface; extra force can obscure where material is being removed.
Check your working position as well as the surface. The full stroke should clear the clamp and bench without forcing an awkward wrist angle. Turn and reclamp the part when necessary, keeping the marked reference faces visible.
Approach the line, then check the fit
As the fit approaches the target, shorten the working area and reduce the amount removed between checks. Switch to a finer rasp, suitable file or supported abrasive while enough material remains to remove the previous scratches. Match the sanding support to the curve; unsupported paper can soften corners that need to stay distinct.
Check the final fit with the actual mating part or template. A smooth-looking surface alone does not establish the correct size. If too much has been removed, reconsider the part or joint instead of enlarging the rest of the shape simply to match the mistake.
Clear the teeth and protect the cut
Clogged teeth can make the tool feel blunt. Clear debris using the brush or file card the maker recommends, with the cutting surface away from your hand. Avoid knocking the rasp against a hard surface. Inspect it after cleaning before increasing pressure.
Store rasps separately so their teeth do not strike other tools. Follow the maker’s corrosion-protection advice and remove any residue that could transfer to wood before working on a finish-sensitive part. A small practice offcut is useful for checking both the cut and cleanliness when the tool next comes out.
Choose your next guide
- Belt Sanders — Compare sanding equipment for shaping and surface preparation.
- Router Bits — Choose profiles and shanks for the intended routing operation.
- Drywall Rasps and Sanders — Distinguish board-edge shaping from joint-compound finishing.
Browse woodworking and shaping or explore all 47 tool guides.