Identify the surface you need to change
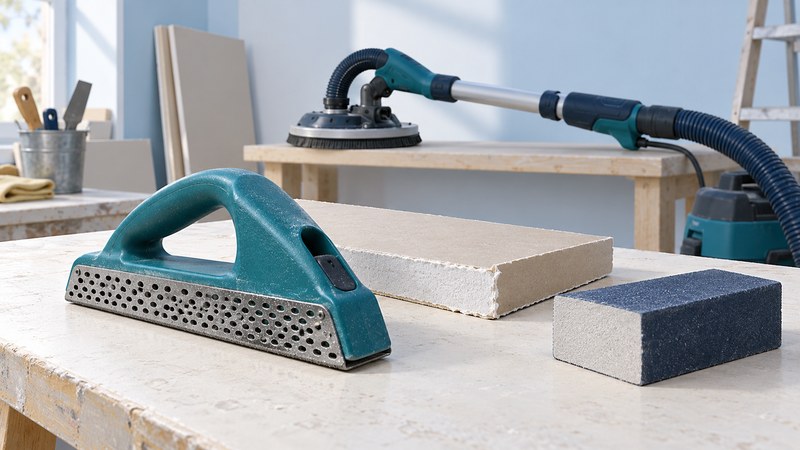
A drywall rasp shapes the cut edge of a gypsum panel. A sanding block, sponge or suitable powered sander refines joint compound on the face of an installed surface. Begin by identifying which material is high, rough or incorrectly fitted: the exposed board edge, a ridge of dried compound or the surrounding paper face.
| Job | Tool to consider | Result to check |
|---|---|---|
| Trim a rough cut edge | Drywall rasp or suitable surface-forming tool | A clean, controlled edge that fits the intended opening |
| Smooth a small compound ridge | Fine abrasive on a supported hand block | A smooth transition with the panel paper intact |
| Touch up a compatible finished joint | Damp sponge, where the compound maker permits it | The ridge is reduced without washing out the joint |
| Finish a large approved area | Compatible pole or powered sander with extraction | An even surface, manageable access and effective dust capture |
A rasp’s cutting surface is too aggressive for feathering a finished joint. Conversely, trying to sand a substantial fitting error wastes effort. Correct the panel fit before beginning the finishing sequence.
Fit a board edge with a rasp
A compact surface-forming tool can remove small irregularities from a cut edge. Stanley identifies its Surform pocket plane for sheetrocking and edge-smoothing work; check the intended materials and replacement blade for the particular tool.
- Mark the material that actually prevents the panel from fitting. Support the panel so the edge is accessible and stable.
- Work in small, controlled strokes using the tool’s intended cutting direction. Keep fingers away from the cutting face and protect the paper at the edge.
- Clear debris by the tool’s recommended method, then check the fit again before removing more.
- Stop when the intended fit is reached. Follow the panel-system instructions for joint gaps and installation details.
Refine compound in small steps
Let the compound reach the condition specified for sanding. Use the compound manufacturer’s abrasive recommendation and inspect the surface with light directed across it. Work on the raised imperfection and check frequently; a depression calls for a finishing correction, while more sanding removes surrounding material.
The USG installation and finishing guide (PDF) describes light sanding after drying, protection of the paper face, and damp-sponge touch-up where only minimal sanding is needed. Its guidance also calls for HEPA-filtered dust collection with power sanding. Follow the instructions for the actual panel, compound and finish system.
For sponge work, use the specified sponge and avoid dripping or excessive rubbing. For dry sanding, keep the abrasive supported so finger pressure does not dig grooves. Clean and inspect the trial area before deciding whether to continue with the same method.
Arrange dust capture and access
Include dust control when selecting the tool. NIOSH’s drywall-sanding research documents substantial exposure reductions with vacuum sanding systems compared with the unventilated methods studied. Those findings support capture at the sanding point; they do not establish the performance of every vacuum and sander combination.
Check the material safety data, tool instructions and extraction requirements together. Confirm hose fit, filtration, collection capacity and filter maintenance. Use eye protection and respiratory protection appropriate to the material and exposure. A visibly cleaner room alone cannot establish that airborne exposure is adequately controlled.
Arrange stable access, lighting and hose routing before reaching a ceiling or high wall. A long handle changes reach and balance; it does not make an unstable working position acceptable. Stop if the head becomes difficult to control or dust capture deteriorates.
Judge readiness for decoration
Inspect under the lighting that will reveal the finished surface, including light from nearby windows. Look for ridges, scratches, torn paper and abrupt transitions. Follow the coating-system instructions for cleaning, priming and any further corrections.
Keep a short record of the compound, abrasive and successful trial method for the next room. The useful endpoint is a surface ready for its specified finish, with the board paper preserved and defects corrected.
Choose your next guide
- DeWalt Screw Guns — Plan depth-controlled fastening and verify the exact screw-gun model.
- Wood Rasps — Explore hand shaping for curves, edges and fitted parts.
- Belt Sanders — Compare sanding equipment for shaping and surface preparation.
Browse woodworking and shaping or explore all 47 tool guides.