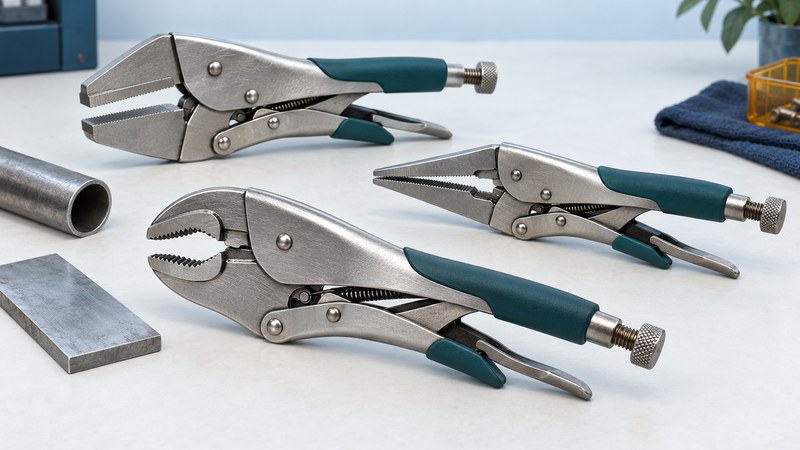
Start with the jaw shape
Vise-Grip is a familiar locking-plier brand. The tool category includes several jaw shapes and release mechanisms, so choose around the object you need to hold and the space around it. A locking handle holds an adjustment; the quality of the grip still depends on fit, contact and the condition of the jaws.
| Profile | Typical reason to choose it | Fit check |
|---|---|---|
| Curved jaw | Contact around a rounded object | The jaw shape seats securely on the actual diameter |
| Straight or broader jaw | Contact on a flatter workpiece | The contact area suits the part and the intended load |
| Long nose | Reach into a restricted space | The narrow jaws have adequate access and contact |
| Specialized clamp form | A particular assembly or holding operation | The model is intended for that operation |
Inspect the actual tool rather than relying on its overall length. Opening capacity, jaw thickness and handle clearance affect fit. The IRWIN Original long-nose model is an example of a reach-oriented design with adjustable pressure and a release trigger.
Adjust on a supported workpiece
- Support the work independently and identify where jaw marks would be acceptable.
- Open the tool and position the jaws so they contact the intended surfaces squarely.
- Use the model’s adjustment screw and instructions to establish a suitable fit. Make small trial adjustments with the handles open.
- Close the handles with controlled hand pressure. Reposition or readjust if closure requires excessive force or the jaws slip.
- Check the release path before continuing the task. Keep fingers clear of the jaw and handle pinch areas.
There is no universal number of screw turns or clamp force for every locking plier. Workpiece stiffness, jaw shape and tool size all affect the setup. Practice on scrap when marking or deformation would matter.
Learn the release before loading the tool
Release mechanisms differ. Traditional models commonly use a separate release lever; IRWIN’s Fast Release curved-jaw model uses a triggerless release design. Read the instructions for the tool in your hand and practice opening it without a load.
Before releasing, support anything that could drop or move when the grip opens. Remove external force and keep your hand out of the release path. A tool that suddenly opens can allow stored tension in an assembly to move the work.
If the mechanism will not release normally, stop and reassess the supported setup. Hammering, heating or adding a handle extension can damage the tool and make control worse.
Use the right holding method
Locking pliers can temporarily hold parts during suitable hand work, but a specific fixture may be required when the work can rotate, fall or move under power. Use the holding equipment prescribed for a drill press or other machine. A locking plier is not a rated lifting attachment or a substitute for structural support.
For ordinary nuts and bolts, start with a correctly fitting wrench or socket. Serrated jaws can mark surfaces and damage fasteners. Ordinary handle coverings also do not establish electrical insulation.
CCOHS guidance on pliers covers selecting a suitable tool, inspecting jaws, protecting eyes and avoiding misuse such as hammering or extending handles. Apply the manufacturer’s own limits to the particular locking model.
Inspect and store the tool
Check the jaws, adjustment threads, pivots and release mechanism before use. Remove debris that interferes with contact or movement and lubricate only as the manufacturer directs. Replace damaged tools instead of trying to restore them with heat or improvised modifications.
Store the pliers where the jaw profile and size remain easy to identify. When a particular tool belongs to an assembly setup, record the intended contact points and release order with that job. The next use should begin with a fresh fit check.
Choose your next guide
- Needle-Nose Pliers — Choose reach, jaw shape and control for small parts.
- Drill Presses — Plan supported, repeatable holes with a stationary drill.
- Tool Sets — Build a household kit around the repairs you actually do.
Browse hand tools and kits or explore all 47 tool guides.