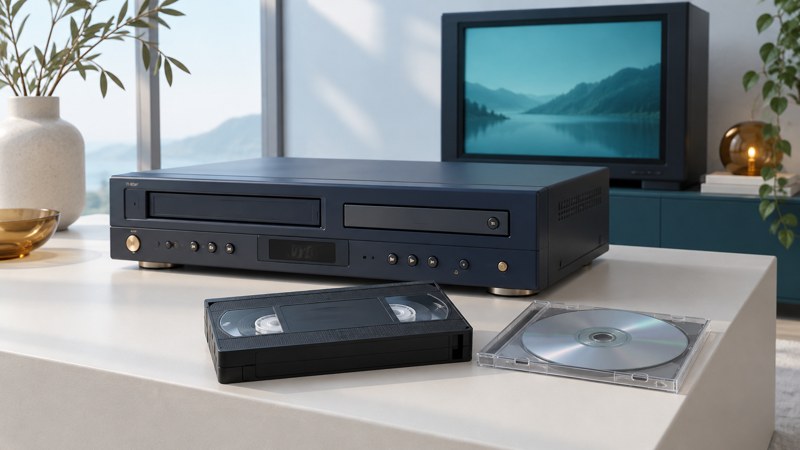
A DVD/VCR combination puts a tape deck and an optical-disc deck in one cabinet. Its usefulness depends on what each side can actually do. Identify the complete model number, then check playback, recording and output connections separately before buying adapters or inserting an irreplaceable tape.
Identify the kind of combination you have
| Capability | What it enables | Evidence to find |
|---|---|---|
| DVD playback | Watching supported movie discs | A supported-disc list and DVD playback instructions. |
| VHS playback and recording | Watching tapes and, where supported, recording an input onto VHS | Tape controls, recording instructions and the supported video system. |
| DVD recording | Making an authored DVD from an allowed source | Explicit recordable-DVD formats and disc-recording instructions. A DVD tray alone establishes none of this. |
Photograph the front, rear connections and complete model label. Include any regional suffix. Find the manufacturer’s operating manual; similar-looking players can route signals differently. A “dubbing” button needs a documented direction: DVD to tape, tape to DVD, or a more restricted operation.
Connect both decks, then test them separately
- List the TV’s inputs. Match names and signal types, not just plug colors. If it has only HDMI, investigate an active converter that accepts the combo’s actual output.
- Find the combo’s shared outputs. Look for the manual’s connection intended to carry both VHS and DVD. Identify any separate DVD-only sockets.
- Connect picture and sound. Follow both manuals with equipment off. Component video uses three video connections; its audio takes a separate route.
- Select the TV input and deck. Play a known-good DVD, then a nonessential known-good VHS tape. Confirm picture, dialogue, pause and stop for each.
- Write down both routes. If switching decks also requires switching TV or receiver inputs, label that in your setup note.
A concrete example appears in Sony’s SLV-D380P operating instructions, printed pages 21–23: the component-video connection and specified DVD audio outputs serve the DVD side. This explains how DVD playback can work while VHS remains invisible on the same connection. Apply those socket rules only to the documented model.
With an HDMI-only TV, verify converter direction, accepted video system, audio input and output resolution. A passive cable with RCA plugs at one end and HDMI at the other does not perform analog-to-digital conversion. For equipment-specific connection choices, use Sony’s recorder connection guide alongside the actual manuals.
Choose a route for home-video transfer
For your own home recordings, start by deciding whether the desired result is a watchable DVD or a computer file. A combo with a playback-only DVD deck needs another device to make either result.
- DVD-recording combo: check supported blank media, tape-to-DVD dubbing, recording modes and finalization in its exact manual. Rehearse with nonessential material and a new blank disc.
- Playback combo plus computer: use a compatible capture device that accepts the VHS deck’s analog video and audio. Check OS/software support and preview a short capture before recording a whole tape.
- Professional transfer: for valuable, damaged or unfamiliar tapes, ask how the service handles the original, what files it supplies, how it checks sound and completeness, and whether it returns the tape.
Keep the original tape after a successful transfer. Play the resulting file or disc, check the beginning, middle and end, and listen for missing channels or loss of synchronization. Keep an additional copy of the finished files on separate storage. A new filename or completed progress bar alone does not establish a complete transfer.
Inspect a used combo before relying on it
Ask for an actual playback demonstration of both decks. Check that the correct remote is included and that menus, tracking controls and input selection are accessible. Listen for abnormal transport noise and confirm that a test tape ejects normally. Stop if tape handling is erratic; an irreplaceable recording is a poor diagnostic cassette.
| Symptom | Investigate |
|---|---|
| DVD works; VHS gives a blank screen | Deck selection and a shared VHS/DVD output. Check whether the chosen socket is DVD-only. |
| Picture but no dialogue | The audio route for that deck, receiver input and left/right cable connections. |
| Tape plays; no DVD recording command exists | Whether the disc deck is playback-only. Look for explicit DVD recording support. |
| A newly recorded DVD fails elsewhere | Disc type, recording mode and finalization in the originating recorder. |
| VHS looks stretched | TV aspect-ratio/zoom settings; preserve the tape’s intended picture shape. |
Use the recorded-disc compatibility guide for finalization questions. For a disc-only setup, a separate DVD player may simplify everyday operation while the combo remains available for tapes.