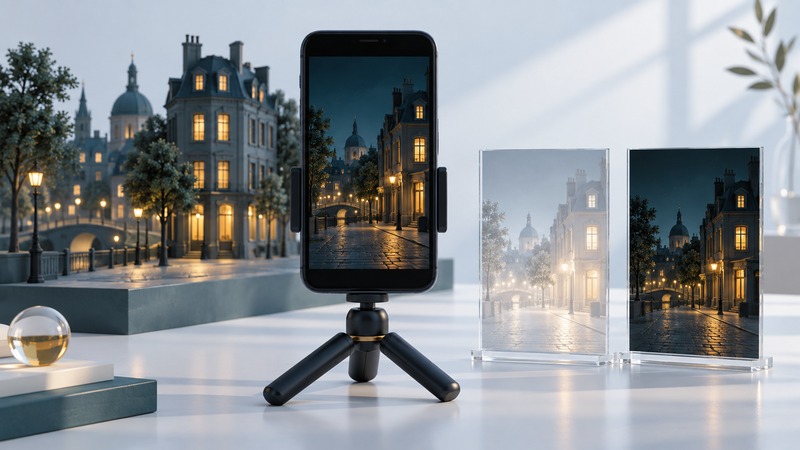
A night photograph can look better when you ask the phone to make it darker. Automatic processing often tries to reveal shadow detail, turning an atmospheric street into a bright, flat scene. Start by lowering exposure compensation or the camera’s brightness control. Use manual shutter speed and ISO when you also need to control movement, noise, or consistency. Aperture is adjustable only when the selected camera has the necessary hardware.
You need your phone’s camera app, a scene you can photograph twice, and a moment to inspect the saved pictures. A stable support helps with still scenes. The aim is a photograph with intentional brightness, useful highlight detail, and the amount of motion you want.
First try a darker automatic exposure
Separate two problems: a picture can be brighter than you intended while still containing detail, or important highlights can be clipped into featureless patches. Lowering the capture exposure can help protect those highlights; simply darkening an already clipped saved image cannot recreate the missing detail. Tiny bare bulbs may still appear white. Judge the illuminated sign, face, or building surface that matters.
- Frame the scene and focus on your subject. Start with the main camera, often labeled 1×. Wipe smudges from the lens if lights have an unusual haze.
- Make an automatic reference picture. Keep your position, lens, and framing steady for the comparison.
- Lower the exposure or brightness control. If it uses EV values, try −0.7 EV, then −1.3 EV. These are comparison points, not universal night settings. If the slider has no numbers, make two visibly darker versions.
- Open the saved pictures. Compare bright details, subject visibility, motion and the feeling of the shadows. Processing can change the preview after capture.
- Change Night mode only if needed. For a still scene, its extra capture time may improve detail. For moving people or an overly bright result, compare a shorter capture or an ordinary Photo-mode shot with Night mode off.
Exposure compensation tells the automatic system to aim brighter or darker while it continues choosing settings. In conventional exposure terms, −1 EV asks for one stop less and −2 EV for two stops less. HDR processing and tone mapping mean the saved display brightness need not change in that exact ratio. Keep the brightest important details and let unimportant shadows stay dark.
Aperture, shutter speed and ISO: what changes the picture?
Aperture is the physical lens opening. A smaller f-number admits more light; a larger f-number admits less and can increase depth of field. Many phone camera modules have a fixed aperture. Switching between main, ultrawide and telephoto cameras can select a different lens opening, but it also changes the view and often the sensor. Treat that as choosing a camera, not turning an aperture dial.
Some phones do have a variable aperture. Use a real Lens Aperture control only where the manufacturer supports it. A Portrait-mode f-number or Depth control commonly changes simulated background blur. Apple describes Portrait Depth Control as a background-blur adjustment; it does not add light to the exposure. For the optical principle, see Nikon’s aperture explanation.
Shutter speed is the exposure duration, usually written as seconds or fractions of a second. A 1/250-second exposure is shorter than 1/30 second: it gathers less light but can reduce movement blur. A tripod reduces camera movement; it cannot keep a walking person still. A night-mode countdown describes the overall capture process, so use a control explicitly labeled shutter speed or exposure time when you need a specific duration.
ISO controls the camera’s signal gain and brightness calibration. Increasing it can make a short exposure usable, but it does not collect additional light. Very low light and high-ISO results often show grain, reduced color quality or heavy smoothing. The useful target is enough exposure for the subject with an acceptable shutter speed, not the lowest ISO at any cost. Nikon’s ISO guide explains the trade between ISO and exposure time.
On a narrow screen, scroll the table sideways. Keyboard users can focus the table region and use the arrow keys.
| What you want | First control to try | What to check |
|---|---|---|
| A darker night scene | Negative exposure compensation or lower camera brightness | Important lights retain detail and the subject remains readable. |
| Sharper moving people | Shorter shutter time; allow more ISO if needed | Faces and hands are sharp enough; grain is acceptable. |
| Cleaner detail in a still scene | Stable support, longer exposure, lower ISO; compare Night mode | Fine detail improves without camera shake or moving-object ghosts. |
| More optical depth of field | Smaller physical aperture, if available; otherwise adjust distance and framing | Near and far details look sharp at the intended viewing size. |
| The same brightness across a series | Exposure lock or fixed settings | The light has stayed constant; changing scenes may need a fresh exposure. |
With aperture, shutter and ISO all fixed, a ±EV display may be a meter reading showing departure from the camera’s recommendation. It may no longer be an active brightness control. To darken that manual exposure, shorten the time, lower ISO, or close a supported physical aperture. With Auto ISO still active, the phone may raise ISO to compensate for a faster shutter.
On iPhone: start with Exposure, then check model-specific tools
In Apple’s Camera app, tap your subject and drag the sun/exposure control downward. For a repeatable series, touch and hold the focus area until AE/AF Lock appears, then adjust brightness. Tap again to release the lock. You can also open the camera tools and choose Exposure for the slider. Tool placement varies by iOS version. Apple’s camera-tools instructions show the current interface.
On supported models, Night mode activates in low light. Open its control to compare the available capture durations, including Off when offered. Keep the phone steady until capture finishes. The longest option is useful for a still scene; try a shorter one for movement. Apple’s Night mode guide explains the capture-time slider and how flash or Live Photos can deactivate Night mode.
When your iPhone offers physical aperture and shutter controls
As checked in September 2026, Apple documents Lens Aperture, Shutter Speed and White Balance on iPhone 18 Pro models, using the Main camera. Open Camera Controls, choose the tool, then select an aperture value or move the shutter slider. A histogram is also available. Follow Apple’s advanced-camera guide for the supported modes. These controls are distinct from Portrait Depth.
For a dark scene on a variable-aperture model, begin with a low f-number to gather light. Close the aperture when extra depth of field is worth a longer exposure or higher ISO. Judge the result; stopping down can eventually soften fine detail through diffraction.
When the built-in app lacks the control you need
For direct ISO and shutter adjustment, a compatible manual camera app is an option. Halide documents manual shutter speed and ISO for iPhone. Check its current device support, available lenses and purchase terms before choosing it. Select its manual mode, set one variable, and watch whether the other remains automatic. A different app or capture process can produce a different HDR, noise-reduction and color result; compare it with Apple Camera before making it your default.
On Pixel and other Android phones: check the actual controls
In Pixel Camera, open the adjustment/controls panel and look for brightness or exposure; some versions also show a slider after tapping the viewfinder. Lower it for your darker comparison. A Shadows slider changes the treatment of darker areas, so check bright details separately. Google’s Pixel 8 Pro camera description distinguishes exposure and shadow controls from manual focus, shutter and ISO, and states that HDR+ remains active with its Pro Controls.
On a supported Pixel, open Pro Controls, select Shutter speed or ISO, and move its slider. Return that control to Auto when finished. Google’s Pro Controls help explicitly lists Pixel 8 Pro, 9 Pro and 9 Pro XL; the Pixel 10 Pro and Pro XL specifications also list Pro controls. These are examples, not an exhaustive current model list. An Android version number or a “Pro” name alone does not establish which controls a particular camera exposes.
For Night Sight, compare the still scene with the phone supported, then with automatic Night Sight disabled if movement or the rendering is a problem. Google’s low-light instructions describe the Night Sight slider and the More light setting; menus vary by version.
Other Android manufacturers may place manual settings in More → Pro or a similarly named mode. Inspect which camera is selected and which sliders are enabled. If the supplied app lacks them, Open Camera’s own help explains its Camera2 API option and device-dependent manual ISO/exposure support. Where supported, select Camera2 API, then a non-auto ISO or M to reveal manual sliders. An app cannot create a variable aperture or a camera capability the device does not expose.
Three practice scenes that make the tradeoffs visible
The following are illustrative starting experiments, not measured presets. Available shutter times and ISO values depend on the selected lens and app. Keep the same framing, focus and lighting when comparing.
On a phone with a physical aperture that offers both f/2 and f/2.8, closing from f/2 to f/2.8 admits roughly half the light. Doubling exposure time or ISO restores approximately the same nominal brightness. This is an optical example, not a claim that every phone offers those aperture values.
Review the saved image, then reset the camera
Compare at a consistent, comfortable screen brightness. Zoom in to check the important edge or face, then zoom out to judge the picture as a whole. A histogram, when available, helps locate extremes; a pile-up on the right warrants checking important highlights, while deep shadows can be an intentional part of a night scene. The preview histogram may differ from the processed result, as Open Camera’s documentation cautions.
If the whole picture is smeared, shorten the exposure or steady the phone. If only the person moves, shorten the exposure or improve the light. If lights have halos, inspect the lens before blaming ISO. If shadows become noisy after editing, aim for more captured light in the next still-scene exposure, or accept darker shadows. White balance can correct an unwanted color cast; it solves a different problem from exposure.
Keep an ordinary automatic capture as a comparison when trying RAW or a new manual app. RAW can offer editing flexibility, but processing, storage needs and low-light quality vary. For more on evaluating computational changes, see AI in photography and checking results.
Download the phone-exposure field notes (plain text) to record settings and what improved. When finished, release AE/AF Lock, return exposure compensation to zero, and restore shutter, ISO, white balance and any physical aperture to Auto as appropriate. Check whether your app preserves settings across sessions so tonight’s dark exposure does not spoil tomorrow’s snapshot.
Continue with a simple portrait session, deliberate landscape exposure and framing, or the photography library.