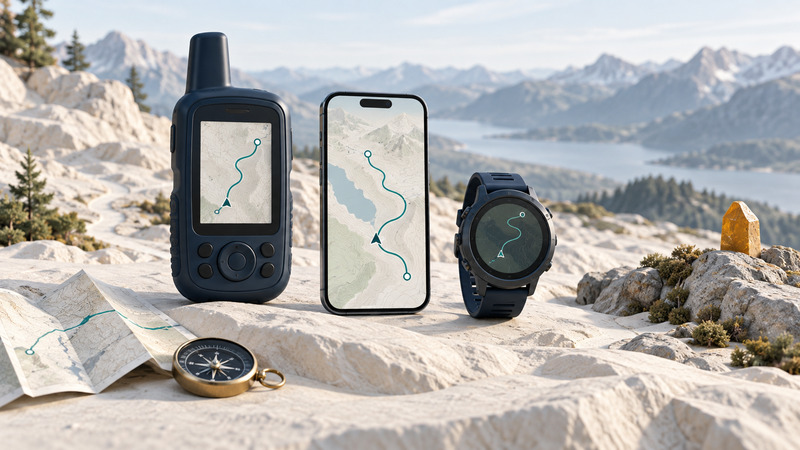
The best hiking GPS is the setup you can read, power and operate on your actual route. A phone with downloaded topographic maps can be a useful starting point; a handheld may earn its place through physical buttons, field power options or a dedicated display; a watch offers convenient course checks at a glance. Choose the combination around terrain, trip length and your ability to recover when one device becomes unavailable.
This guide helps recreational hikers compare equipment. For preparing a receiver you already own, use the handheld GPS field-navigation guide.
Start with the outing
Write down the longest expected day, whether junctions are obvious, the likely weather, and the route's escape options. A familiar signed loop and an unfamiliar route above treeline put different demands on navigation. Check the land manager's current trail conditions, closures and requirements before deciding that a downloaded route is usable.
The National Park Service recommends knowing how to use navigation equipment before leaving, carrying a physical map as backup and bringing extra phone power. It also recommends leaving your trip plan and expected return with someone. See the NPS Ten Essentials. GPS reception and the ability to contact help are separate functions: establish the communications capability of your equipment independently.
| Setup | Useful strengths | What to establish before choosing |
|---|---|---|
| Phone with offline hiking maps | Larger map view; convenient planning and sharing | Exact offline map layers, route access, wet-screen behavior and power for navigation plus other phone uses |
| Dedicated handheld | Separate navigation device; buttons or field-replaceable power on some models | Exact maps, controls, supported file imports, battery type and spare-power arrangements |
| GPS watch | Quick route and progress checks without unpacking a larger screen | Breadcrumb versus mapped guidance, readable junction detail, independent GNSS and navigation-mode battery use |
| Complementary devices | Different controls and power sources can cover different failures | Whether both depend on the same phone, account, download or charger |
A second screen is a stronger backup when it retains the route and maps independently. For example, a watch that depends on a nearby phone for a map can lose that function when the phone loses power. Read the exact model's documentation and rehearse the disconnected state.
Test the map you will actually use
Download an area that includes the route, trailhead, nearby junctions and reasonable alternatives. A narrow strip around the planned line gives little context if plans change. Open the downloaded area at several zoom levels; a route line over a blank background offers much less information than a usable topographic map.
On a short familiar walk, disable mobile data and Wi-Fi while keeping the device's location function available. Reopen the app, select the saved route and inspect the map. This tests local data availability; it does not recreate every possible field failure. Check whether you can see contours, trail names and your current position without signing in again.
Choose a junction on the practice route. Approach it, stop somewhere suitable, and identify your position, the intended branch and a recognizable landscape feature. The useful result is an understandable decision at the junction. A smooth track recording by itself tests a different function.
Budget power with a real trial
Battery claims describe particular operating modes. Screen brightness, map viewing, satellite settings, temperature, recording and phone use can change consumption. Test the mode you intend to carry, including regular map checks. Charge beforehand and record start/end percentages and duration.
Fictional planning example: a three-hour local trial uses 24 percentage points of battery. The observed rate is 24 ÷ 3 = 8 percentage points per hour. Applying that rate to an eight-hour outing gives 64 percentage points. Starting at 100% would leave a nominal 36%. This is a rough planning projection, not a runtime guarantee: battery behavior and conditions can change. Plan reserve capacity and a tested way to replenish it; do not plan to finish at zero.
For multiday trips, account for the power bank, cable, connector protection and charging opportunities as part of the carried system. Test charging with your actual devices. A lightweight spare cable may resolve a different failure from a larger battery.
Interpret a position cautiously in difficult terrain
Buildings, tree cover and reflected signals can degrade satellite positioning; device design and satellite geometry also matter. GPS.gov's accuracy explanation separates those local influences from the quality of the satellite broadcast. A new receiver may help in some conditions, while an obstructed location still warrants independent checks.
If the position jumps, compare successive observations with the map and surroundings from a safe location. Avoid following a pointer across an obvious obstacle. An off-route alert, distance-to-finish figure or straight line to a waypoint needs interpretation in the terrain. Route-finding skills remain part of the equipment choice.
Make the purchase decision
Choose a phone-based setup when its offline maps, controls and power have passed your trial. Add a handheld when its particular controls, mapping or power arrangements solve a demonstrated problem. Choose a watch for the navigation detail it can actually display, with fuller mapping available when the outing requires it. See GPS watch recording and navigation for mode differences.
Use the hiking navigation trial checklist to record the route, downloads, operating mode, power trial and backup plan. Repeat the essential checks after major app updates or when changing devices. The best choice is the one whose behavior you have verified before needing it in unfamiliar terrain.