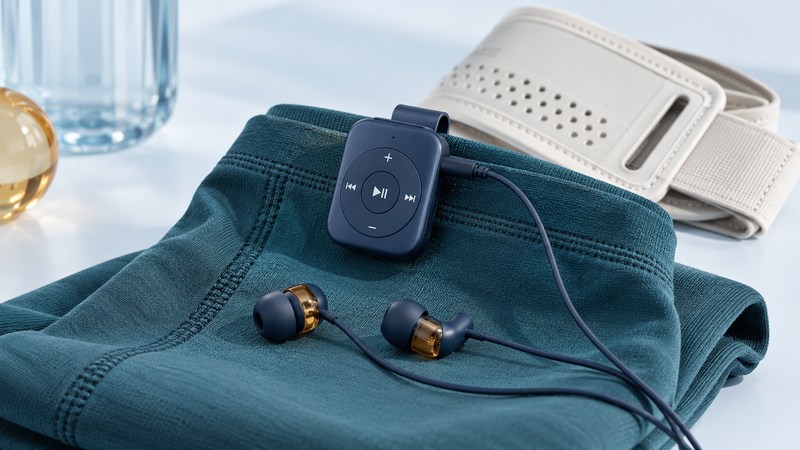
A wearable music player earns its place when it stays secure, is easy to control and plays the music you prepared. Evaluate it in the position where you will wear it. A tiny device can still be awkward if its buttons disappear under clothing, its clip twists, or its headphone cable pulls against the attachment.
Choose the music workflow first
Decide whether you need a prepared set of audio files or playlists maintained in an app. A simple clip-on player can make a small, repeatable collection convenient. A service-based routine needs a supported app, account and offline behavior on the exact device. Check those requirements before comparing size or battery claims.
Audiobooks and long recordings deserve their own checks. Test whether the player resumes the correct track and position after being switched off, how it sorts chapters, and whether you can change playback speed if that matters to you. A music shuffle mode can be convenient for songs and frustrating for a book.
Use a short playlist with familiar tracks and one long recording for the first trial. Keep the master files on your computer. The offline-playback checklist helps establish that the sound is actually stored and available when disconnected.
Check the attachment with your actual clothing
Fit is a relationship between the player, its clip or armband, and the clothing you use. Try the attachment on the garment you intend to wear, over a clear surface where you can retrieve the player if it slips. Check that the clip engages fully and that fabric does not press continuously on a button.
- Find the controls while stationary. Identify pause, volume and track navigation by touch. Practice lowering the volume before starting playback.
- Try the lock. Learn which controls still respond and how to unlock the player. Check for accidental presses when clothing moves across it.
- Move normally in a clear area. Bend, reach and walk a few steps. Observe slipping, bouncing, pressure and unwanted button presses.
- Check the headphone connection. Leave enough cable for ordinary movement while avoiding loose loops that catch. Make sure a turn of the head does not pull the player loose.
- Read the display in its real position. Check the angle, brightness and text size without assuming you will hold the player in front of your face every time.
These are practical fit observations, not a certification test. A device that passes a short indoor trial still needs evaluation in the permitted conditions of its intended use. If secure attachment requires constant adjustment, try another location or a different carrying method.
As one documented example, the Clip Sport Go manual (PDF) describes a control lock operated through its Back button. Its exact button sequence belongs to that model. Use your own manual rather than assuming every small player locks in the same way.
Read the environmental limits and battery-test conditions
A clip, an armband and the word “sport” do not establish water protection. The Clip Sport Go manual linked above instructs users to keep that player away from rain and other moisture. For any other model, find the manufacturer’s explicit permitted conditions, including any restrictions on sweat, water exposure, charging and drying. Treat swimming as a separate requirement that must be expressly supported.
Read headphone safety guidance too. SanDisk’s manual cautions against extended high-volume listening and using headphones while driving, cycling or operating a motorized vehicle. Pause listening when an activity requires full attention. A design that leaves the ears less covered still needs a sensible listening level and an appropriate setting.
Battery hours need context. The Clip Sport Go data sheet (PDF) ties its “up to 18 hours” figure to continuous 128 kbps MP3 playback. That is a manufacturer test condition, not a guarantee for an aging player, different files, frequent screen use or your particular session.
Record the charge indication before and after a representative session. Repeat using the same files, output and screen routine so comparisons mean something. Battery icons may be coarse; use the result to judge whether a normal session finishes with a comfortable margin, not to extrapolate a precise full-runtime claim from a few minutes.
Try a short session before relying on the player
Begin in a familiar, low-distraction setting where the manufacturer permits the equipment to be used. This editorial checklist focuses on usability; it does not replace the product’s operating and safety instructions.
- Before: confirm the files are loaded, choose a comfortable low starting volume, check the attachment, and learn pause and unlock.
- During: note slipping, cable pull, missed button presses, accidental volume changes and difficulty reading the screen. Stop to adjust the setup.
- After: check resume position and remaining charge, inspect the attachment, and follow the manufacturer’s cleaning and drying instructions before charging.
Keep a brief record of the model, wearing position, headphones, files and result. A player is a good match when the music workflow and physical controls both work for you. For loading problems, follow the USB transfer guide; for broader device choices, use the portable-player comparison framework.
Explore Music Players
Browse music-player guides and earlier reporting, or use the offline-library setup guide. Primary documentation is linked where it supports the guidance. Model and software details were checked October 7, 2026.