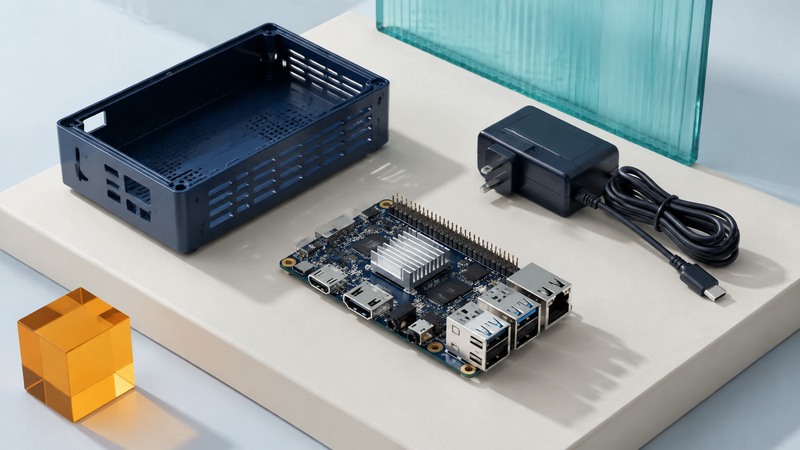
A single-board computer puts a processor, memory, and many supporting functions on one circuit board. It becomes a useful system when its operating system, interfaces, power supply, storage, and enclosure fit the job. Start with a task you can test, then choose hardware that supports it.
This guide helps makers and technical buyers turn a project idea into a requirements list and a first working prototype. You will need the exact board documentation and a small example of your real workload. A demonstration video or processor benchmark can help you form questions, but your application supplies the acceptance test.
Choose the type of computer first
On a narrow screen, scroll the table sideways. Keyboard: focus the table and use the arrow keys.
| Platform | A useful starting point for | Check before committing |
|---|---|---|
| Microcontroller board | Reading sensors, controlling simple devices, predictable small programs | Electrical interfaces, timing requirements, memory, and development tools |
| Single-board computer | Linux services, cameras, networked applications, and projects needing accessible I/O | Supported OS image, drivers, storage endurance, power, and enclosure cooling |
| Mini PC | Desktop software or an appliance built around standard computer peripherals | Processor architecture, OS licensing, ports, serviceability, and continuous-operation needs |
| Industrial SBC | Integration with a backplane or a product needing a controlled lifecycle | Mechanical standard, electrical compatibility, temperature limits, supplier support, and integration work |
An industrial board may require a chassis, backplane, and specialist power arrangement. A Pentium M CompactPCI board from 2004 illustrates this industrial approach. Today's broad SBC category also includes development boards that can sit on a desk and boot from removable storage. Define which integration level you intend to support.
Write requirements in terms of observable behavior
Replace “fast enough” with a workload and result: “display this dashboard at the intended resolution while collecting one sensor reading each second.” Specify what happens if the network disappears, how much history to retain, and whether someone can visit the device after a failure.
Record five items before comparing products:
- Software: application name, processor architecture, supported OS release, required drivers, and update method. Confirm that a needed binary exists for the board's architecture, or that building it is practical.
- Interfaces: count actual simultaneous devices, including display, camera, storage, network, keyboard, and expansion boards. Check shared buses and bandwidth.
- Power: use the board maker's supply specification, including cable and peripheral requirements. A physically matching USB-C plug establishes connector fit; voltage/current negotiation and cable capability establish usable power.
- Environment: enclosure, ambient conditions, dust exposure, mounting, and access for service. Evaluate heat with the intended case closed.
- Recovery: retain the OS image, application configuration, credentials-management plan, and a tested way to restore the service.
The Raspberry Pi getting-started documentation provides model-specific power guidance and OS installation steps. For example, its Pi 5 guidance distinguishes a 5 V, 5 A supply from a 5 V, 3 A arrangement with a reduced peripheral power allowance. Consult the table for the exact model rather than extending one board's requirement to the family.
Budget the complete system
Include the board, suitable supply, storage, case, cooling, adapters, and any powered hub or interface board. Count the time needed to configure and maintain it. A lower board price can be offset by extra components or a driver problem that dominates the project.
For storage, estimate both capacity and writes. A dashboard that mostly reads a few files differs from a logger writing continuously. Keep essential data on a backup schedule and provide controlled shutdown or a documented recovery design where power interruptions are expected. Filesystem resilience and application recovery should be tested together.
Worked example — fictional environmental logger: A record is 200 bytes and is written once per second. The raw daily data is 200 × 86,400 = 17,280,000 bytes, or 17.28 MB using decimal units. Thirty days is 518.4 MB. This estimate excludes database indexes, filesystem overhead, logs, updates, and temporary files. Measure the actual folder growth during a trial before setting a retention limit.
Average electrical consumption also accumulates. A fictional assembled unit drawing 8 W continuously uses 8 × 24 × 365 ÷ 1,000 = 70.08 kWh per year. This is an illustrative energy calculation, not a prediction for a particular board; measure at the wall if supply losses matter to the decision.
Bring up the board in a controlled sequence
- Download the supported OS image through the board maker's official instructions. Confirm the exact target storage device before writing the image; imaging replaces its contents.
- Start with the documented supply, cooling, and minimum peripherals. Boot, complete setup, install updates, and record the OS and firmware versions.
- Run a small instance of the real application. Check its outputs before adding further hardware.
- Add peripherals one at a time. If instability appears, the last change gives you a specific interface, driver, or power demand to investigate.
- Run the intended workload in the actual enclosure. Record temperature indications, throttling warnings, responsiveness, storage growth, and errors through a representative duty cycle.
- Restart cleanly and confirm automatic service startup. Test restoring the configuration to spare storage while the working original is kept intact.
The manufacturer's guide to cooling Raspberry Pi devices explains how workload and heat dissipation affect thermal behavior. Use it as an example of the evidence to seek for your board. Cooling should preserve useful sustained performance in your enclosure, with acceptable noise and service needs.
Resolve common prototype failures
If the board reboots when USB storage starts, inspect supply adequacy, cable quality, and peripheral power requirements before changing the application. If performance falls after several minutes, compare thermal and workload logs. If a camera is detected but cannot stream at the needed mode, verify the exact sensor, driver, connection, and supported resolution/frame-rate combination.
A GPIO header needs electrical scrutiny. Pin numbering, logic voltage, current limits, and interface functions come from the board documentation. Use suitable interface circuitry for the connected device; pin alignment alone is insufficient evidence of compatibility.
Finish the prototype with a short record another person could use: hardware revision, parts list, OS image/version, installation instructions, representative inputs and expected outputs, backup location, and recovery steps. That record is what turns a successful experiment into a maintainable system.