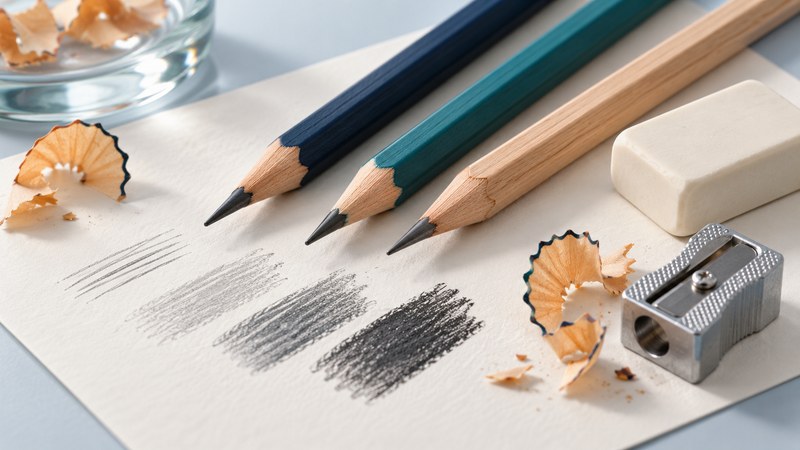
Choose a wood-cased graphite pencil by the mark it makes on your paper, the pressure you use and how often you want to sharpen it. HB is a useful starting point for ordinary writing. Compare a harder and a softer grade on the same sheet before buying a large set or box.
A pencil's grade is only part of the experience. Point shape, paper texture, barrel shape and the eraser all affect the result. The small comparison below helps you choose a working combination for notes, diagrams or sketches.
Read the grade as a starting point
Ordinary graphite pencil cores combine graphite with binders rather than metallic lead. STAEDTLER's explanation of its pencil manufacture describes graphite, clay and water, followed by forming, firing and further treatment. In that graphite-and-clay system, more clay generally produces a harder core and more graphite a softer, darker-writing core.
H identifies the harder side of the familiar scale and B the softer, blacker side. Increasing numbers extend in the corresponding direction: 4H is harder than 2H, while 4B is softer than 2B. HB sits between the H and B groups. The labels help you choose samples; compare the actual products on your paper.
| Job | Grades to compare | What to look for |
|---|---|---|
| Everyday notes | HB and B | Readable writing at comfortable pressure, with manageable smudging |
| Light construction lines | H or 2H alongside HB | A pale visible line that erases without leaving a groove |
| Broad sketch shading | 2B and 4B alongside HB | A useful range of tones and controllable edges |
| Fine labels or diagrams | HB and H with similar points | Legible small marks and reasonable point retention |
These are trial choices, not requirements. Faber-Castell's hardness guide likewise distinguishes writing grades from softer drawing grades. Specialized charcoal, coloured and water-soluble pencils use different materials or behavior; choose those deliberately when a task calls for them.
Compare pencils on the paper you actually use
Gather three pencils, your usual paper, a suitable sharpener and one clean eraser. Label each test area with the pencil model and grade. Using the same eraser and similar points keeps the comparison easier to interpret.
- Write a short sentence. Use normal pressure and your ordinary writing size. Read it at the distance at which you use your notes.
- Draw a few parallel lines. Include fine labels or a small diagram if that is the intended work. Notice whether the point catches or needs unusually firm pressure.
- Shade three small patches. Use light, medium and firmer comfortable pressure. Compare the useful range without pressing hard enough to dent the sheet.
- Try an erasure. Erase part of each patch with the same eraser and similar gentle strokes. Inspect both remaining graphite and any paper damage.
- Check handling. After a comparable amount of writing, inspect point wear and any smearing from normal hand movement. Record which pencil stays easy to read and control.
If you scan or photocopy pencil notes, include that step before choosing. Judge the copied result as well as the original. Paper size, weight and printer compatibility explains how to keep a paper trial consistent.
Match sharpening and grip to the task
Use a sharpener suited to the pencil's barrel diameter and shape. A long fine point offers detail but exposes more core; a shorter point can be useful when breakage interrupts ordinary writing. Stop sharpening when the point is useful for the work rather than removing wood automatically.
Empty shavings before they obstruct the sharpener and inspect it for visible damage. Follow the maker's instructions for clearing a jam or replacing a blade; avoid reaching into an exposed cutting mechanism. Keep a spare working pencil nearby so sharpening does not interrupt every task.
Try round, hexagonal or triangular barrels if grip or rolling off the desk is an issue. Evaluate comfort during actual writing, including the shorter length after repeated sharpening. For a consistent fine line without wood sharpening, compare mechanical pencils and their lead mechanisms.
Change one thing when the result disappoints
Faint writing: try a slightly softer grade or a different paper before increasing pressure. A readable mark made comfortably is a better target than a deeply pressed line.
Smudging: compare a harder grade, lighter pressure and a clean sheet under the resting hand. Check whether the issue arises during writing, page turning or erasing, because each suggests a different adjustment.
Repeated point breakage: compare a second pencil in the same sharpener and the first pencil in another compatible sharpener. This helps separate a damaged core, a worn cutting edge and an overly delicate point. Protect pencils from being dropped or rattling loose among heavy tools.
Marks remain after erasing: look at the sheet under angled light. A groove is different from residual graphite. Try a lighter touch, a softer grade for the needed darkness, and an eraser compatible with the paper.
For an examination, follow that organizer's current permitted-tool rules. A pencil's grade or marketing description alone does not establish that it is accepted.
A familiar form with room for variation
Wood-cased pencils protect a narrow core while allowing it to be exposed by sharpening. Faber-Castell's history of pencil manufacturing describes fired graphite-and-clay leads placed between grooved wooden boards, followed by cutting into individual pencils. Formulations, barrel materials and finishing methods vary across products. That is why a small working trial remains useful even when two boxes carry the same grade.
Keep the successful sample's model, grade and paper details with your supply list. You can then reorder a known combination or compare a replacement fairly. Return to the Office Supplies library.