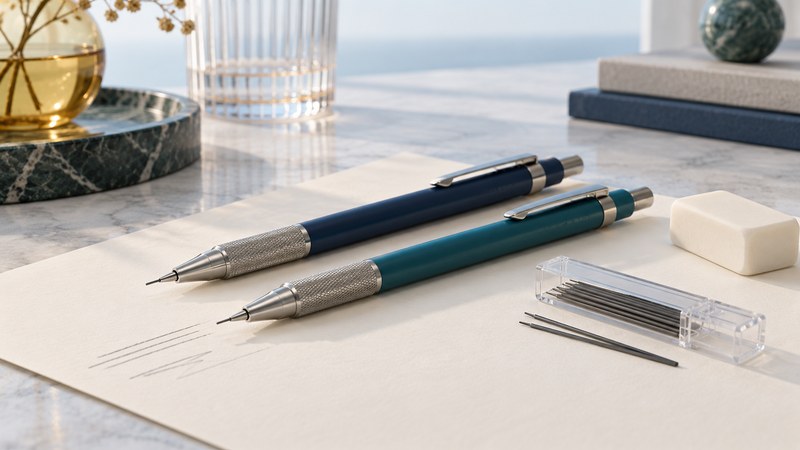
A useful mechanical pencil combines a lead diameter that suits your writing, a grade that makes the mark you want, and a body you can hold comfortably. Match refills to the pencil's marked size, learn how its feed mechanism works, and test it on the paper you actually use.
For a straightforward starting point, compare 0.5 mm and 0.7 mm pencils with HB graphite. Write a few lines with each before choosing. Fine detail, firm writing pressure, frequent erasing and carrying the pencil in a pocket may lead you toward different designs.
Diameter and grade answer different questions
The number in millimetres identifies the nominal lead diameter; HB, B or H describes the grade. A 0.5 mm HB refill and a 0.7 mm HB refill have the same grade label but fit different mechanisms. Match the diameter printed on the pencil or specified in its manual. Keep different sizes in their labelled containers.
| Diameter | Useful comparison task | What to watch |
|---|---|---|
| 0.3 mm | Small annotations and fine detail | Try light pressure and the manufacturer's recommended lead extension. |
| 0.5 mm | Small handwriting, notes and ruled work | Check whether the line is clear at your normal writing pressure. |
| 0.7 mm | Everyday notes and a somewhat broader mark | Compare legibility and breakage with 0.5 mm on the same paper. |
| 0.9 mm and larger | Broader writing or sketching | Check available refill grades and whether the wider line suits your lettering. |
These are trial suggestions rather than quality rankings. Pentel's point-size guide (PDF) illustrates the different line widths. The mark also changes with the angle of the pencil and the way its point wears.
Start with HB as a middle ground. B grades are generally softer and darker; H grades are generally harder and lighter. Pentel's hardness guide (PDF) shows the progression. Compare actual samples when changing brands, paper or pressure. If you press hard to get a visible line, trying a darker grade may be more useful than pressing harder with the same refill.
Choose a mechanism you enjoy using
Click advance: a top or side button advances a small amount of lead. It is easy to control, and suitable for a simple refill-and-write routine. Extend only enough lead for the design to work properly.
Sliding sleeve: a protective tube can move back as the lead wears. Some pencils are intended to write with the lead supported by that sleeve. Follow the model's instructions rather than extending a long exposed point. Pentel's Orenz instruction leaflet (PDF) is one example of a design with a particular sleeve technique.
Automatic feed: the pencil advances lead as part of its writing mechanism, reducing repeated button presses. Check how that exact model starts, retracts and refills. “Automatic,” “protective” and “retractable” describe different features; a retractable tip, for example, can be useful when carrying a pencil even if lead advancement is manual.
Try the grip while writing a paragraph. Notice where your fingers sit, whether the clip rubs, and whether you keep shifting your grip. Compare the body balance and the eraser's size. Confirm that replacement erasers and the desired lead size are available before choosing a design for regular use.
Refill carefully and diagnose one problem at a time
Find the refill opening in the model's instructions. On many conventional pencils it is beneath the top cap and eraser; cartridge and other mechanisms differ. Use the stated diameter, length and loading quantity. Replace the parts, point the pencil toward paper, and operate the normal feed until a short usable point appears.
A pencil that stops advancing may be empty, overfilled, loaded with the wrong size, or obstructed by a broken fragment. Start by checking the refill specification and supply. Repeated force on the button can make diagnosis harder. Use the manufacturer's clearing procedure and designated tool where supplied; avoid forcing an improvised pin into a fine sleeve. Pentel's product FAQ points Orenz owners toward model-specific jam instructions.
| Symptom | Check first | Next step |
|---|---|---|
| Lead breaks at the tip | Excess extension and writing pressure | Reduce exposed length as appropriate to the model; try a supported thicker size in a different pencil if needed. |
| Lead will not advance | Supply, diameter and loading method | Follow the model's jam-clearing instructions if correct refills still fail. |
| Lead slips back | Correct refill size and whether the button is being pressed while writing | If it persists, inspect or service the gripping mechanism as the maker directs. |
| Tip scratches or catches | Lead position and a bent or damaged sleeve | Compare with the manual's writing position; seek a replacement part for damage. |
A five-minute writing comparison
For paper characteristics that affect the result, see the paper selection guide. Use a separate clean eraser for large corrections if the pencil's small eraser makes that task awkward.
For an exam, follow the organizer's current rules
Checked October 6, 2026: ACT's test-day checklist calls for sharpened No. 2 pencils with erasers and excludes mechanical pencils. College Board's current digital SAT rules permit a pen or pencil for scratch work. Accommodations and different assessments can have their own instructions.
A manufacturer's statement that graphite scans like a No. 2 pencil addresses the mark, while the exam organizer decides what equipment is allowed. Before packing, check the rules for your exact assessment and administration, and bring the required tools. Return to Office Supplies for related guides.