Identify the tool before ordering a part
The Wave name spans several Leatherman designs. Start with the model marked on the tool, then compare its implements and construction with the manufacturer’s information. This matters most when buying used tools or replacing cutters, bits, clips and sheaths: a family name alone is too broad for a reliable parts order.
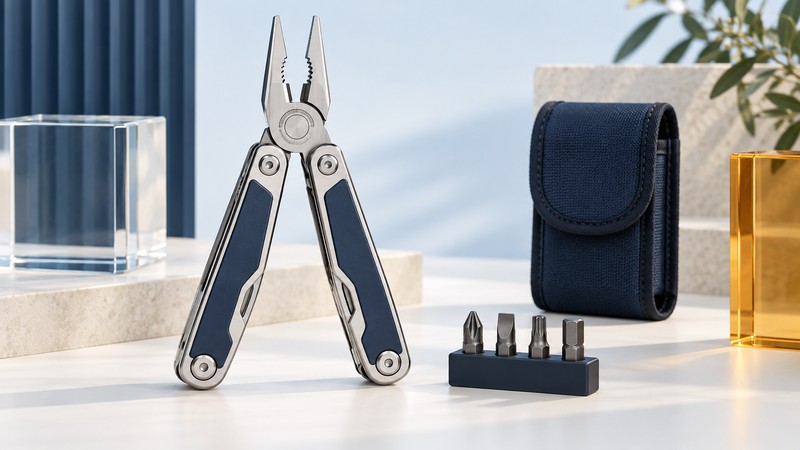
Leatherman’s Wave history traces the original to 1998 and describes the 2004 revision with stronger jaws and all-locking features, followed by the Wave Plus with replaceable wire cutters. Treat older Wave tools as their own versions. Record markings and take clear photographs of the closed handles, open pliers and tool layout if you need the manufacturer to identify yours.
The current US product pages checked in October 2026 describe both Wave Plus and Wave Alpha. The comparison below concerns those named versions. It does not establish that their internal parts can be exchanged.
Compare the implements that change your decision
| Version | Useful identifying or selection detail | What to verify |
|---|---|---|
| Older Wave | Earlier generations have different implement and cutter arrangements. | Match the actual tool to its documentation or ask Leatherman before ordering parts. |
| Wave Plus | 420HC plain and serrated blades, replaceable wire cutters, large and small bit drivers, spring-action scissors. | Check the included bits and the accessory’s named compatibility list. |
| Wave Alpha | MagnaCut main blade, G10 scales and large outside-accessible scissors. | Check its distinct implement layout, dimensions and carry accessories. |
For selection, think about which operation happens most often. A user who frequently reaches for scissors may value the Alpha’s outside access; someone who wants a separate serrated blade should inspect the Plus’s tool list. Those are task-based comparisons, not claims that one steel or model makes every job easier.
Compare closed thickness and the complete carried kit, including sheath and bits. If a tool will live in a bag, access may matter differently than when it is carried in a pocket. Handle the actual model where possible before choosing a carry accessory.
Match the driver before buying bits
The Plus and Alpha product pages list both a large and a small bit driver. Treat them as different interfaces. The small driver serves the eyeglass-style bit; the large driver takes the corresponding Leatherman flat bits. Confirm the bit profile and size against the fastener, and ensure the chosen bit is included in the set you are considering.
Leatherman’s Bit Driver Extender is specified for tools with a large bit driver and accepts Leatherman flat bits or standard 1/4-inch bits. Its current fit list includes Wave Plus and Wave Alpha. This is the adapter that provides the stated standard-bit compatibility; do not assume a conventional hex bit fits directly into every multi-tool driver.
Use the correct dedicated tool when a job requires a specified tightening torque. A multi-tool handle provides no calibrated torque reading; the torque-wrench guide explains that separate task.
Check clips, cutters and sheaths separately
For every accessory, record the part name or SKU and the explicit supported-model list. The Leatherman accessories catalog contains several clip and carry designs; their attachment methods differ. Match the exact accessory page to your identified tool before ordering.
- Cutters: confirm that your tool has replaceable inserts and that the replacement kit lists your model. Follow the kit instructions. A damaged plier head needs service assessment rather than an assumed insert repair.
- Clips: compare the attachment system as well as the model name. A screw-mounted clip and a quick-release clip are different products.
- Sheaths: check internal fit and closure with the actual model and accessories you intend to carry. Allow for the complete kit rather than closed length alone.
- Older tools: send the manufacturer the model markings and photographs when a current fit list does not clearly identify the version.
Keep the confirmed part number with the tool record. It makes later replacement easier and reduces reliance on marketplace descriptions that group several generations together.
Inspect, clean and choose the right service route
Before use, check the relevant implement, lock and bit retention for damage or incomplete engagement. Follow the model instructions for opening and closing, keeping fingers out of folding paths. Stop using an implement that will not lock or retain its accessory correctly. Keep this tool away from energized electrical equipment. CCOHS hand-tool guidance requires tools designed for electrical work, including appropriate insulation.
The Leatherman maintenance guidance explains cleaning, drying and lubrication, including fresh-water rinsing after saltwater exposure. It also distinguishes straight and serrated sharpening methods. Choose cleaning products compatible with the actual handle and finish, and keep grit out of the pivots.
Use Leatherman’s current service and warranty instructions for damaged tools. Check the policy in your region and discuss sentimental or older tools before sending them in, since the available repair or replacement may matter to you. Do not assume that buying a cutter kit resolves damage elsewhere in the mechanism.
A useful ownership record contains the version, identifying photographs, the manual, confirmed accessory part numbers and any service history. That record lets the next buying or maintenance decision start with the actual tool.
Choose your next guide
- Leatherman Tools — Compare multi-tool functions, format and model-specific accessories.
- Swiss Army Knives — Compare pocket-knife functions, size and care.
- Needle-Nose Pliers — Choose reach, jaw shape and control for small parts.
Browse hand tools and kits or explore all 47 tool guides.