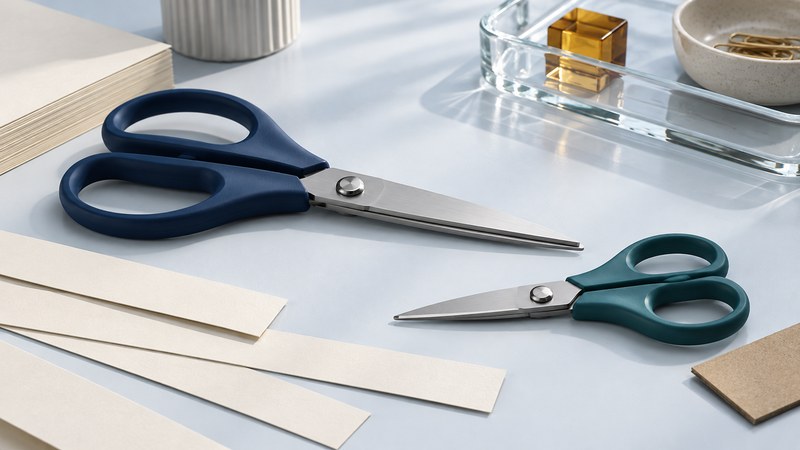
Good office scissors fit the cutting hand, suit the material, and make a controlled cut without forcing the handles. Start with the jobs you do most often: trimming paper, opening light packaging, cutting labels or working on small craft pieces. A brief trial with those materials tells you more than an “all-purpose” label.
For a shared office, list the users as well as the tasks. A right-handed pair, a true left-handed pair and a separate tool for heavy packaging may serve the team better than several identical scissors. Check the maker's permitted materials before assigning any pair to tougher work.
Check handles and blade orientation together
Handle shape and blade arrangement are separate features. Some symmetric handles accommodate either hand while the blades retain a particular orientation. For a left-handed user, look for an explicit description of left-handed blades and try the pair in the intended hand.
For example, Fiskars' description of its left-handed scissors specifies reversed blades and handles shaped for left-handed users. Look for that complete description when comparing products, then judge the fit in your own hand.
Open and close the handles through the range needed for the job. Check whether the finger openings pinch, whether a hard edge presses into your thumb, and whether the cutting line remains visible. Test with the gloves normally used for that task, if any. Stop the trial if the movement causes discomfort; change the fit or task arrangement before continuing.
Choose the working shape for the material
| Task | Useful feature to compare | Trial question |
|---|---|---|
| Long paper edges | Usable blade length and comfortable opening | Can you follow a straight line with smooth overlapping cuts? |
| Small curves and details | Shorter blades and a controllable tip | Can you turn the material without hiding the line? |
| Adhesive labels or tape | Manufacturer-approved adhesive-cutting or non-stick design | Does residue build up, and how may the blades be cleaned? |
| Light card or packaging | Documented material capability and grip | Does it cut the actual thickness without excessive force? |
| Fabric work | A dedicated fabric-cutting pair suited to the material | Does the fabric stay controlled through the complete cut? |
A listed overall length includes the handles. Compare the usable cutting length and opening as well as the headline size. Long blades can reduce the number of cuts along an edge; a shorter pair may be easier to steer around tight shapes. Try both on the same sample if the job combines those needs.
Fiskars' scissors collection guide distinguishes paper, detail, fabric, non-stick and other designs. Use that sort of task description to narrow a shortlist. A coating, steel name or warranty does not by itself specify the thickness or material the tool can cut. For wire, hard plastic ties or heavy packaging, obtain a tool explicitly intended for that material.
Run a simple comparison before buying several pairs
- Prepare representative scraps. Use the office paper, card or label stock involved in normal work, within each candidate's stated capability. Remove staples and other hard items.
- Mark the same shapes. Draw a straight line and a gentle curve. Add a small detail only if detail cutting is a real requirement.
- Cut in your normal position. Keep the supporting hand clear of the blades. Observe the view of the line, required opening and control near the tip.
- Inspect the result. Look for folded material, ragged edges, uncut sections and difficulty completing the last part of a cut.
- Repeat and record. Compare comfort and control after several representative cuts. Note the exact model, handedness, material and thickness so colleagues can interpret the result.
Diagnose the cut before changing the blades
Paper folds between the blades: check handedness, material thickness, visible damage and the maker's tension guidance. Try a single sheet of suitable plain paper. If it still folds, arrange service or replace the pair; increasing hand force can obscure the underlying problem.
Blades feel sticky: inspect for adhesive or other residue. Use only a cleaning method compatible with the exact handles, finish and coating, then dry and store as directed. Cleaning directions for one specialty model should not be generalized to every pair.
The cutting edge seems dull: check sharpening compatibility before using a sharpener. Match the exact scissors and sharpener instructions, including handedness, blade shape and any coating. Treat serrated, pinking or curved blades as specific compatibility questions. Use the manufacturer's manuals and product-support route to establish the appropriate method; arrange suitable service or replacement if it is unclear.
Store scissors closed in a stable holder or their supplied cover, away from loose items that hide the tips. Keep children's access and the office's storage rules in mind. For a shared drawer, mark the task or handedness where users can identify it without testing every pair. See the rotating desk-organizer guide for checking compartment fit and safe retrieval, or return to Office Supplies.