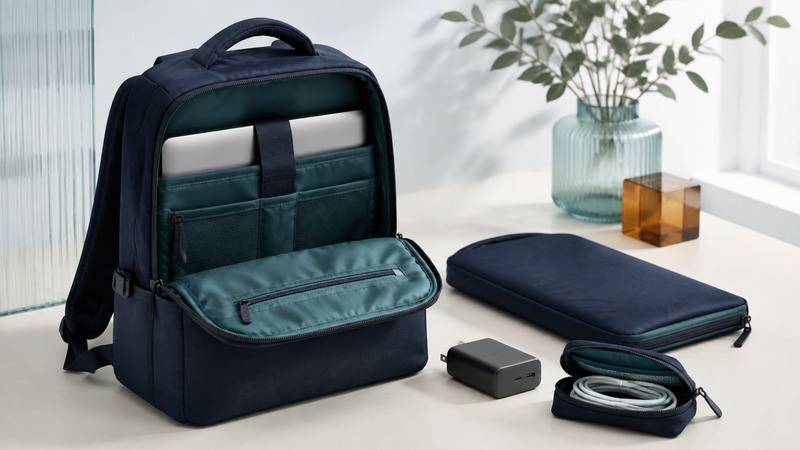
Choose a laptop bag by the size and weight of the equipment you carry, the way you travel, and the protection the complete bag provides. Begin with the computer's actual dimensions, then evaluate the compartment, closures, packing arrangement, and loaded comfort.
A screen-size label is a starting filter. Two computers with the same display diagonal can have different widths, depths, and thicknesses. Measure the closed computer with any case you intend to leave attached, and compare those measurements with the usable internal laptop compartment.
Measure fit in three dimensions
Record width, depth, and thickness in one unit system. Include protruding feet or an attached protective shell where they affect fit. For a sleeve inside a backpack, check two separate fits: computer to sleeve, then the sleeve's external dimensions to the backpack compartment.
Manufacturers may publish both internal and external measurements. For example, tomtoc's Voyage-A10 sleeve page lists those separately for its variants. Confirm the selected size and intended computer models on the actual product page; dimensions from another variant can look convincing while describing a different sleeve.
Worked example — fictional measurements: A closed laptop measures 32.0 × 22.0 × 1.8 cm. A compartment is listed at 33.0 × 23.0 × 2.2 cm internally. Subtraction leaves 1.0 cm in width, 1.0 cm in depth, and 0.4 cm in thickness overall. If centered, the width difference is only 0.5 cm per side. Those figures are a screening calculation, not guaranteed clearance: seams, curved corners, padding, and the entry opening also matter.
Try inserting and removing the computer without forcing the zipper or flexing its lid. Close the compartment with the intended accessory load packed. If the closure presses against the screen or the corners strain the fabric, choose a different size or arrangement.
Examine the protection around the device
On a narrow screen, scroll the table sideways. Keyboard: focus the table and use the arrow keys.
| Feature | What to look for | Why it matters |
|---|---|---|
| Padded base and corners | Coverage where the computer rests and near likely contact points | A padded front panel alone leaves other contact areas to inspect |
| Compartment position | Separation from hard items and some support above the bag's bottom where designed | Books, chargers, and a hard landing can load the computer differently |
| Retention and closure | Secure fit without excessive pressure or loose movement | The device should stay in its intended compartment while carried |
| Lining and seams | Smooth contact surfaces and covered abrasive hardware | Repeated insertion and movement can mark the case |
| Opening | Enough clearance to insert the device comfortably | Published internal size may exceed the narrowest entry point |
These are inspection questions, not drop-test ratings. If a supplier makes a tested-protection claim, look for the method, device or dummy used, drop surface and orientations, and pass criteria. Use the claim within those stated conditions.
The old article at this URL emphasized reinforced fabrics and metal hardware. Material descriptions can explain construction, but they leave seams, closures, padding, and the loaded bag to be evaluated. A strong outer fabric and an uncomfortable or poorly fitted compartment can coexist.
Plan for the weather on your route
Determine whether the bag is described as water-resistant, supplied with a rain cover, or supported by a specific tested waterproof claim. Check seams, zipper paths, openings, and the manufacturer's care instructions. Water exposure involves the complete closure system as well as the fabric.
For a walk involving sustained rain, consider an appropriate separate protective layer around the electronics and check how you can close it correctly. Keep wet umbrellas, bottles, and damp clothing separate from the computer. A rain cover helps only when it fits the packed bag and protects the relevant openings.
Use the bag for transport with the computer shut down or in a manufacturer-supported travel state. Avoid running a laptop in a closed padded compartment. On arrival, place it on a stable surface with ventilation; the bag and the workstation serve different purposes. Apple's laptop ventilation guidance illustrates why the operating surface matters; follow the instructions for your exact computer.
Pack the load you will really carry
Lay out the laptop, charger, cables, mouse, notebook, and other essentials. Put small hard accessories in their own pouch or separated pockets so they cannot press against the lid. Use the bag's intended retention and organization features, and check that a bottle pocket keeps liquid containers away from electronics.
Example — fictional daily load: A 1.5 kg laptop, 0.35 kg charger, 0.25 kg of accessories, and a 0.9 kg bag total 3.0 kg, before water, books, or clothing. Weigh the complete packed bag when comparing options. A lighter empty bag can become less comfortable than another design once packed.
Try the bag with both hands free as you would commute. Adjust straps and check whether the bag shifts, pulls backward, or restricts movement. With a shoulder bag, assess the position and how easily you can change sides. For a backpack, assess both straps and any support features as the manufacturer intends. Personal fit is best established by trying the loaded bag.
Test access and daily handling
Perform a realistic sequence: lift the bag, carry it, set it down, remove the computer, retrieve the charger, and pack again. Check whether you must expose the whole contents in a crowded place to reach one item. Confirm that the handles, straps, and zipper pulls are comfortable to use with the load.
Inspect the return policy before buying if fit can only be confirmed at home. After purchase, periodically check seams, strap attachments, zippers, and padding. Replace or repair a worn component through an appropriate service route before it fails during travel.
The final choice should fit the equipment, close without strain, keep hard and wet objects separated, and remain comfortable through your normal trip. Those observable results are more useful than a material name or a screen-size label alone.