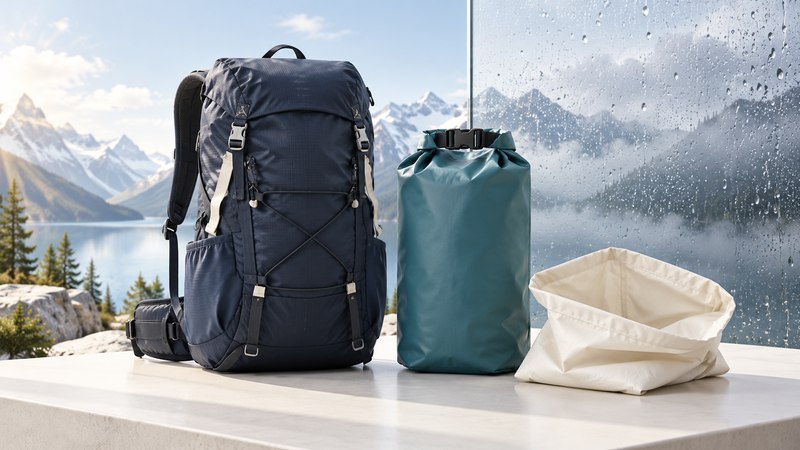
Choose pack protection by the exposure you expect and the contents you need to keep dry. Rain on a day hike, splashes beside water and temporary immersion are different demands. A waterproof fabric claim alone leaves important questions about seams, openings and pockets unanswered.
Begin with the pack you can carry comfortably. Then decide whether an external cover, an internal liner, individual dry bags or a purpose-built waterproof pack provides the right protection and access.
Compare the whole packing system
On a narrow screen, scroll the table sideways. Keyboard users can focus the region and use the arrow keys.
| Approach | Useful role | What to inspect |
|---|---|---|
| Water-resistant pack | Convenient everyday carrying with some weather resistance specified by its maker. | Which seams, zippers and compartments are covered by the claim? |
| External rain cover | A fitted layer over the outside of the pack. | Fit around the loaded pack and attached gear; how it stays secured; the exposed harness side. |
| Internal pack liner | A protected inner compartment for selected contents. | Closure room, punctures, size and whether wet items can be kept outside it. |
| Individual dry bags | Separate clothing, equipment or other contents into protected groups. | Each bag's intended use and closure; access to frequently needed items. |
| Waterproof pack | Integrated protection specified for a complete bag. | Whole-product rating, seam construction, closure instructions and exclusions for outer pockets. |
For a concrete cover example, Osprey's Ultralight Raincover documentation describes taped seams and a drawcord, with sizes matched to pack capacity. Those features describe a fitted cover; assess whether the actual loaded shape and external attachments remain covered.
Make the comparison with your normal load inside. A cover that fits an empty pack or a dry bag that closes before it is filled has not answered the practical fit question.
Read what the manufacturer actually promises
Look for the exact model, tested exposure, closure requirements and which compartments the claim covers. Save the instructions with your gear records. Words such as “all-weather” provide less useful information than a stated test and a clear operating limit.
ORTLIEB's IP-rating explanation distinguishes splash protection, marked IPx4, from temporary-immersion protection, marked IPx7. The first digit in a full code concerns solid-particle protection; the second concerns water. Read the product's own rating and conditions rather than assigning a rating from its appearance. A fabric's water-resistance measurement describes a different test from protection of an assembled bag.
Closure design matters. Sea to Summit's dry-pack guidance says its roll-top dry packs are not designed for submersion because water can enter through the closure. That is a useful warning against treating every product called a dry bag as an immersion case. Other designs may have different ratings; verify the exact model.
For electronics, medication or other contents whose failure would have serious consequences, use protection explicitly appropriate to their intended exposure and storage needs. A bag that keeps rain off clothing does not establish suitable protection for every sensitive item.
Organize access before the rain begins
- Choose the dry group. Identify spare clothing and other items you want to remain dry until needed. Put them in the selected liner or dry bags.
- Leave closure space. Follow the maker's rolling, sealing or zipper instructions. Reduce the load if the bag cannot close as designed.
- Separate wet items. Plan where a damp rain shell or towel will go so it does not soak the protected group when repacked.
- Keep frequent-use items accessible. Decide how to reach water, food and weather layers without repeatedly opening the entire dry compartment in exposed rain.
- Try the full arrangement. Carry the packed bag and practice accessing key items. Adjust weight distribution and fit before the outing.
The important question is which path lets water reach the item: through the bag, through an opening or alongside another wet item already inside. Improving the wrong layer can leave the original problem unchanged.
Inspect, dry and maintain the system
Before each outing, look for holes, worn corners, damaged seam tape, contamination in closures and buckles or zippers that no longer work correctly. Use the manufacturer's cleaning and repair instructions. If protection is uncertain, replace or repair the affected component before depending on it.
After a wet trip, empty and dry the pack and its separate storage bags according to their care instructions. If contents became wet, note when the bag was opened and which compartments were affected. Do not test a questionable bag by submerging valuable contents.
Rain protection is one part of day-hike preparation. For a child's school load, use the separate guidance on backpack fit and comfort.