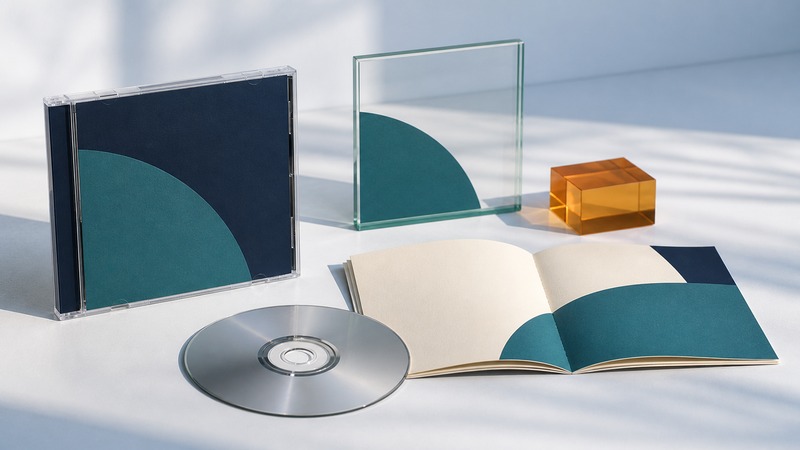
An album's digital cover and its printed CD packaging can share a visual idea while requiring different production files. Decide where the artwork will be used before setting up the document. The printer's template and the distributor's current specifications should determine the deliverables.
One release can need several kinds of artwork
A digital release typically needs one square cover image. CD packaging may need a booklet, tray card, spine panels, and a separate on-disc design. A folded card, jewel case, and multi-panel sleeve do not share a universal template. Start with the exact packaging product and page count, then download the current files supplied by the manufacturer.
On a small screen, scroll the table sideways to read all columns.
| Destination | Main design constraint | Production reference |
|---|---|---|
| Digital cover | One square image that works at thumbnail size. | Current distributor upload requirements. |
| CD booklet | Page order, folds, readable credits, and trim. | Exact booklet template for the page count. |
| Tray card and spines | Panel dimensions, orientation, and narrow text areas. | Template for the ordered case. |
| On-disc print | Printable area, center hole, and process limitations. | Separate disc-printing template. |
As a concrete digital example, DistroKid's artwork requirements call for a JPG in RGB, with a square 3000 × 3000-pixel image described as ideal. Its minimum and rejection rules should be checked at upload time. The same guidance excludes items such as URLs, QR codes, prices, service logos, and references to physical media. This is one distributor's specification, not a universal rulebook for every destination.
A printed booklet can contain a website or production credits that would be inappropriate on that digital cover. Keep a separate export for each destination. Do not upload a photograph of a CD case as if it were the original square cover, and do not send a flattened web thumbnail to the printer as your only production file.
Understand trim, bleed, and the safe area
The trim boundary is the intended finished edge. Bleed is extra background artwork outside that boundary, allowing for small cutting variations. A safe area keeps essential text and details inside the trim boundary. These are three different guides. A background should reach through the bleed; an artist name should remain safely inside the finished piece. Adobe's guide to printer marks and bleed explains the production boundaries.
Disc Makers' CD-dimension and production guide gives a typical 120 × 120 mm front-cover size and explains its bleed, safety, resolution, and color requirements. Use the actual template for the ordered product, including folds and spine areas. Never substitute a generic measurement for the manufacturer's current dieline.
Worked geometry: an explicitly hypothetical square
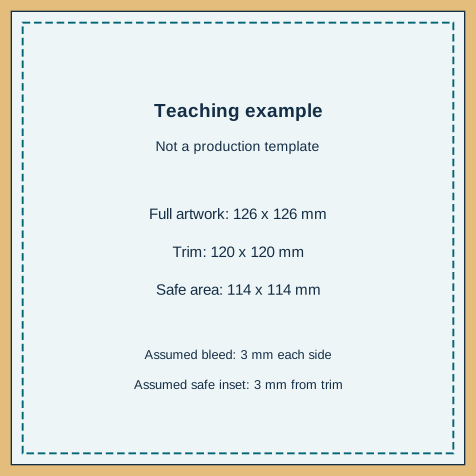
For this teaching example only, assume a 120 × 120 mm finished square, 3 mm bleed on every side, and an additional 3 mm inset inside trim for important content. The total artwork is 120 + 3 + 3 = 126 mm square. The assumed safe square is 120 − 3 − 3 = 114 mm. These assumptions are not a claim that your printer uses 3 mm margins.
Open or download the labeled bleed-and-trim study (SVG). It shows those exact dimensions and says “Teaching example” in the drawing. It is an explanatory diagram, not a production-ready CD template or album cover. Use the printer's file for the real job.
For a raster image covering the full hypothetical 126 mm at 300 pixels per inch, the calculation is 126 ÷ 25.4 × 300 = 1488.19 pixels. Round up to 1489 pixels per side to meet at least that nominal resolution. A 3000-pixel square at 300 ppi spans 10 inches, or 254 mm. Changing a file's resolution label without adding genuine image detail cannot rescue a tiny source. Check pixel dimensions and placed print size together; Adobe's image-size and resolution documentation distinguishes those settings from resampling.
Build a clear cover and keep its permissions
Begin with the relationship between the music and one visual idea. Decide what should be noticed first, then test the cover at a small size. If the artist name and album title are part of the design, compare them with the release metadata character by character. A deliberate text-free cover can work too, provided it meets the destination's rules.
Keep the editable layout, linked images, licensed fonts, and export settings together. Avoid baking tiny text into a low-resolution background early in the process. Separate layers make it easier to adapt the design to a spine or to correct a credit without rebuilding everything.
Commissioned artwork, stock assets, photographs, and typefaces each have terms of use. Keep the permission or license tied to the actual asset and intended print and digital uses. The U.S. Copyright Office's photographer guidance explains that copyright in a photograph generally belongs to its author, subject to rules such as work made for hire. Possessing a file or appearing in the picture does not automatically establish permission to use it on a commercial release.
AI-generated images can help explore a visual concept, but inspect them at final size. Look for malformed objects, accidental lettering, confusing anatomy, and details that imply a real event or endorsement. Add important typography in the layout software so it remains editable and proofreadable. The Copyright Office's AI copyright resources distinguish human contributions from generated material; tool access and commercial-use terms are not a complete rights analysis.
The hero on this page illustrates packaging, not artwork offered for redistribution as your cover. The downloadable geometry study is likewise a teaching aid. For a release, use your own approved art and document the permissions.
Proof the files that will actually be delivered
- Confirm the job. Record packaging type, page count, template version, printer, and digital destinations. Check that all required panels exist.
- Read every word. Verify artist names, title, track order, credits, catalog information, and any required notices against the final release records. Ask a second person to proofread.
- Check geometry and images. Inspect bleed, safe areas, fold direction, spine orientation, effective image resolution, and font handling in the exported file.
- Check color for the destination. Follow the printer's specified profile and proofing process; use the requested RGB export for the digital service. Screen appearance is not a guaranteed print match.
- Review the proof at useful sizes. Examine digital art as a thumbnail and at full resolution. Print a paper mock-up at actual size to check reading and folds, then review the manufacturer's proof before production.
The artwork production checklist (CSV) separates print, digital, rights, and final approval checks. Mark who checked each item and which exact file they approved. A filename such as “final-final-new” is less useful than a release name, destination, version, and date.
If an upload is rejected, read the specific error before changing everything. Check format, square dimensions, RGB mode, and prohibited content first. If print output looks soft, investigate the original pixel dimensions and placement size. Keep corrected exports separate from the source layout so the next revision starts from the right file.
Related resources
- Organize credits and music rights
- Understand files, tags, and portable libraries
- Explore all music resources
Researched and updated September 6, 2026. Primary sources are linked near the relevant information. Product examples illustrate workflows rather than rankings.