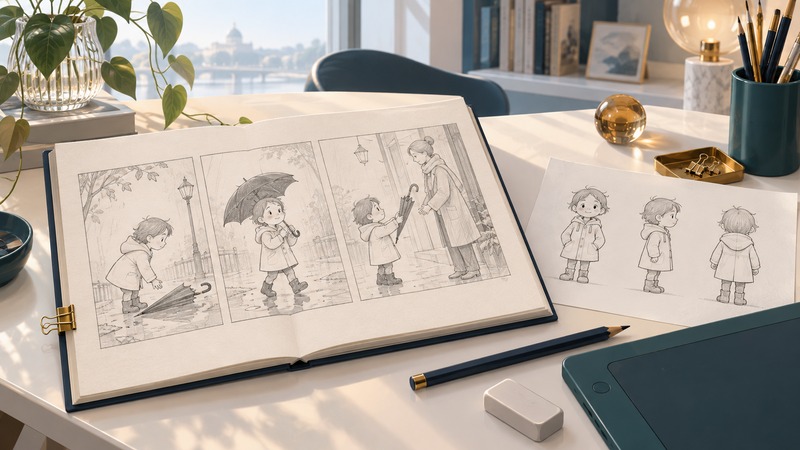
Start with a small story you can finish: one character, one place and one change. A readable three-panel comic teaches more than a folder of unfinished faces because it asks you to connect drawing, acting and page design.
This beginner lesson works with a pencil, eraser, ruler and plain paper, or a drawing app with layers. You will build a simple character sheet, draw an action in a believable space, and make a short comic that another person can follow. Manga includes many visual styles; use these construction exercises as tools for developing your own.
Choose a story small enough to draw
Write three beats before drawing details: a situation, an action and a result. Each beat must show something the reader can see. “A child feels responsible” is difficult to stage on its own. “A child spots an umbrella, picks it up and returns it to its owner” gives you visible actions.
Draw two tiny versions of this sequence, each only a few inches tall. In one, use a wide view throughout; in the other, bring the action closer in the middle panel. Choose the version in which the umbrella is easiest to track. The purpose of a thumbnail is to test the story while changes are cheap.
Construct a character you can repeat
Begin a head with a light circle for the cranium and a smaller jaw shape attached below it. Draw a curved vertical centerline and an eye guideline wrapping around the volume. As the head turns, shift the centerline toward the far side and make the far side of the face narrower. Place ears, nose and mouth in relation to these guides before adding hair.
Choose a proportion for this character and keep it consistent. For the practice sheet, try a stylized figure about four head-heights tall. That is an exercise choice, not a rule for manga or real anatomy. Mark the top of the head, chin, pelvis, knees and soles; compare those landmarks in the front and side views.
- Draw the front view using simple shapes: head, rib cage, pelvis, cylinders for limbs and wedges for feet.
- Place a side view beside it, using horizontal guide marks to maintain height.
- Draw a three-quarter head. Let the eye line and jaw turn together.
- Choose three identifying features, such as a triangular fringe, a short jacket and a round shoulder bag. Repeat them in every panel.
- Draw neutral, surprised and relieved expressions. Change eyebrows, eyelids and mouth as a coordinated group.
Leave hair volume around the skull rather than shrinking the skull to fit the hairstyle. For hands, block the palm first and treat the fingers as grouped directions before separating them. A readable mitten shape is a useful rough; refine the gripping fingers once the umbrella handle is positioned.
A reference sheet reduces accidental changes between scenes. Clip Studio Paint’s comic creation guide describes model sheets and the progression from planning to finished pages. Keep your sheet beside the comic and compare it after each panel.
Give the action weight and a place
Draw a single gesture line through the head, chest and supporting leg. Add the rib cage and pelvis with slightly different tilts so a reaching pose feels active. Locate the planted foot before drawing the raised arm. A character leaning toward an object needs a stance that appears able to support the reach.
For the bench scene, put a horizon across the rough drawing and choose one vanishing point. Draw a simple box for the bench: vertical edges stay vertical, while edges receding straight away converge toward that point. Place both characters’ feet on the same ground plane. A person farther away appears smaller; use the ground and horizon to keep that change consistent.
Take a simple reference photograph of a bench or a willing person holding an umbrella if the action is hard to invent. Study where the elbow bends and how the fingers overlap the handle. Clip Studio’s tools and techniques guide explains establishing panels and perspective tools; the same planning principles work with a ruler on paper.
Build the page around the reader’s eye
Choose the reading direction before arranging a multi-column page. Many Japanese manga read right to left; other comics read left to right. Keep panel order, balloon order and action consistent with the format you choose. Our vertical exercise simply reads from top to bottom.
Rough in any words before polishing the art. A small “Excuse me!” might connect the second and third beats, but the umbrella exchange should remain understandable with that balloon covered. Leave space around lettering, point the balloon tail clearly toward its speaker, and keep it away from the important hand action.
Use panel size and distance deliberately: a wide view establishes the setting; a closer view can emphasize a discovery or expression. The artist-led guide to paneling and flow explains how layout changes pacing. For this exercise, keep the layout simple and let the change in pose carry the sequence.
Ink the outer silhouette and essential overlaps first. Use a slightly heavier line for a foreground overlap and a lighter one for small details. Add two or three value groups—white, midtone and dark—so the figure separates from the bench. If the umbrella disappears, simplify the background behind it before adding more texture.
Finish, test and repeat
Download the two-page manga practice sheet (PDF). Page one provides character and expression spaces; page two contains the three-beat comic exercise and a self-check. Print at actual size or fit to the printable area.
- View the page at its intended reading size. Tiny lettering and dense texture are easier to notice here.
- Cover the dialogue and ask a reader what changed between panels. If they miss the action, enlarge the relevant object or hand movement.
- Compare head size, hairstyle, jacket and umbrella across the sequence. Correct one inconsistency at a time.
- Check feet, contact points and overlaps. A gap between hand and handle can change the meaning of the action.
- Save the finished version and make one new sequence using the same character. Compare how clearly each communicates.
For digital work, preserve the layered original and export a separate reading copy. If you move into color printing, follow the color-management workflow. If you want to explore posing a character in three dimensions, try the 3D anime art guide.