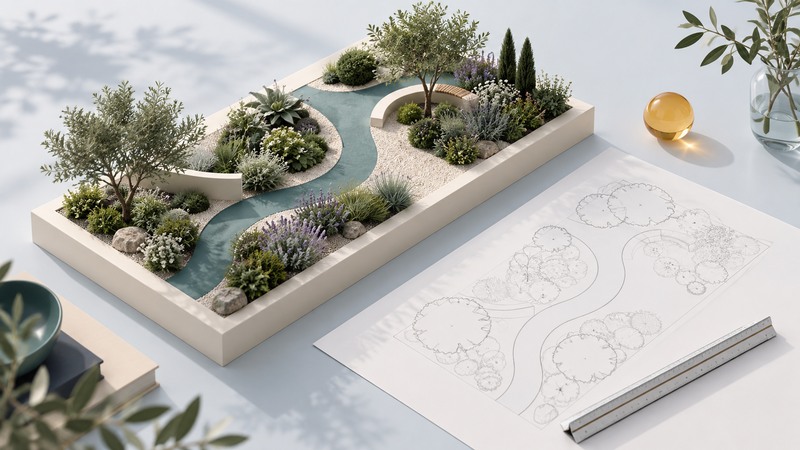
A garden plan is a set of decisions about space, plants and care. Begin with one manageable area, record how it behaves, and draw the mature planting before buying it. The goal is a place you can use and maintain through the seasons.
Write a brief that can guide real choices
Describe the main use in one sentence: “A sunny border with flowers visible from the kitchen,” or “A small herb area I can reach from the path.” Then record who uses the space, how much time you can give it, and which features must remain.
Choose a few priorities. Year-round screening, abundant flowers, minimal watering and little pruning may require tradeoffs. Rank them so a plant's attractive photograph does not decide the whole plan. Keep a separate list for possibilities that can wait.
UF/IFAS's landscape planning guide starts with site and user analysis and carries those observations into the arrangement of spaces and planting. That sequence is useful for a single bed as well as a larger property.
Map the site you actually have
Measure the area and sketch fixed features: doors, gates, paths, fences, trees, drains and structures. Use a confirmed boundary record for work near property lines. Mark service access and known utilities; arrange the appropriate local utility-location service before digging.
Record sun and shade at several times of day. Repeat observations as the season changes, especially where deciduous trees shade the ground. Note wet patches after rain, exposed wind, reflected heat and areas that are difficult to reach. Soil testing through a local service can inform pH and nutrient decisions.
For U.S. perennial selection, the USDA Plant Hardiness Zone Map describes average annual extreme minimum winter temperature. Use it alongside summer heat, moisture, soil and local experience. A zone match alone leaves many important site conditions unanswered.
A simple observation record
| Observation | Write down | How it changes the plan |
|---|---|---|
| Light | Where direct sun falls, with times and season | Place plants according to actual exposure |
| Water | Where rain collects or runs; access to irrigation | Solve drainage and group compatible water needs |
| Space | Measured bed, usable path and overhead clearance | Draw mature plant widths and retain access |
| Existing plants | Health, size and useful habitat or shade | Decide what to retain before designing around it |
| Care | Time available and tasks you can comfortably do | Favor a manageable plant palette and reachable beds |
Arrange movement before filling the beds
Draw where people need to walk, sit, carry tools and open doors. Try temporary markers or a garden hose to test a proposed edge. Walk the route with the equipment you use, and check whether plants at full size would narrow it.
Keep maintenance access visible on the drawing. A bed can look comfortable at planting and become difficult to weed once foliage fills in. Paths and surfaces should suit their users; slopes, drainage changes, retaining walls and accessible routes may need professional design.
Use repetition to make the planting readable. A few recurring plant shapes or materials can connect separate areas. Contrast is most effective when there is a clear place for the eye to rest. UF/IFAS's design principles explain proportion, order, repetition and unity as ways to organize a usable landscape.
Draw plants at their mature size
For each candidate, record its botanical name, expected mature height and width, light and moisture requirements, flowering season and maintenance needs. Confirm local suitability with extension guidance or a knowledgeable regional nursery. Check local invasive-plant guidance before buying an unfamiliar vigorous spreader.
Represent mature spread with circles or irregular outlines at the drawing's scale. Include access space and the clearance needed beside buildings. A tiny nursery pot is a temporary size; the drawing should show the plant you will maintain later.
UF/IFAS's planting-arrangement guidance discusses layers and plant groups. Apply the idea at the scale of your garden: taller structure where it serves a purpose, lower plants where views or access matter, and repetition without crowding every gap.
Plan seasons and workload together
Build a small calendar of flowering, foliage, seedheads, pruning and dividing. Decide what will give structure when flowers finish. Record watering needs during establishment separately from the care expected once plants are established.
Estimate tasks concretely. “Low maintenance” becomes more useful when translated into “I can water containers most days in hot weather, but I can only weed a bed at weekends.” Containers, formal clipping and short-lived bedding plants create different work from a stable perennial planting.
Make a phased list: first access and necessary site repairs, then structural planting, then smaller additions. Leave part of the budget and space uncommitted until you have watched the first season. Avoid compensating for a poor site match with repeated fertilizer or watering changes.
Check the plan on the ground
Before planting, place the pots in their proposed positions. Check views from indoors, doorway clearance and movement along paths. Compare the layout with mature dimensions again. Photograph the arrangement and label plants so later observations have a reference.
At the end of the first season, record which plants established, where water or shade differed from expectations, and which tasks took too much time. Move from that evidence to the next change.
For a small edible project, use kitchen herbs. If roof runoff is part of the design, read rain-chain suitability and drainage before treating it as a decorative feature. For deeper study, see choosing gardening books.