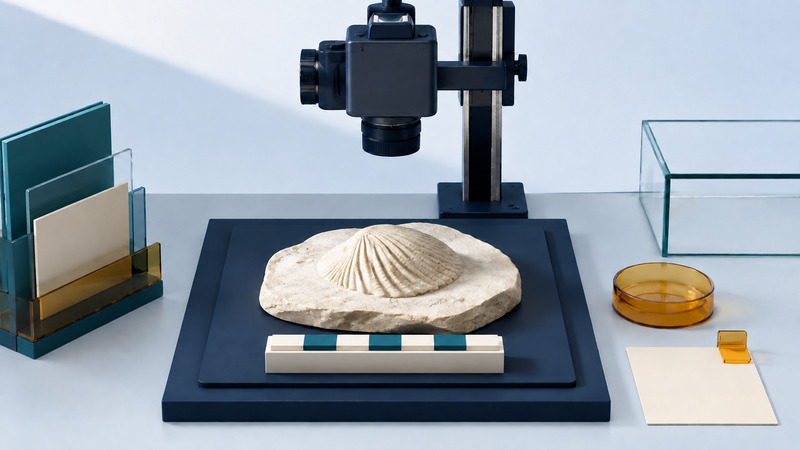
A useful fossil photograph preserves a specimen's identity, scale, orientation, and context. It should let someone check what was measured and how. A beautiful close-up without those details may be hard to identify and impossible to use for a defensible size comparison.
Start the record before the photograph
Give each specimen a stable identifier and use it in the image filenames and measurement table. Keep the original label wording as well as any later interpretation. Record where the specimen or image came from, who supplied the identification, and what is uncertain. If you are working from a published plate, record the paper, figure and panel, catalog number, stated scale, and whether the same specimen appears in other views.
Geological context cannot usually be recovered from appearance alone. Preserve locality and stratigraphic information when known, distinguishing a formation or layer reported on a label from one inferred later. Do not invent a precise age or location to fill an empty field. Keep sensitive locality details in an appropriately controlled record when the collection requires that.
On a small screen, scroll the table sideways to read all columns.
| Record | What to write | Useful distinction |
|---|---|---|
| Specimen and image IDs | A stable specimen ID and separate IDs for each view. | Three photographs of one shell are one specimen, not three independent observations. |
| Provenance and geology | Collection or publication, original label, locality, horizon, and their sources. | Known information versus a later inference. |
| Identification | Taxon if known, identifier, date, and uncertainty or qualifier. | A tentative image-based suggestion versus a documented specialist identification. |
| Measurement | Defined endpoints, view, units, scale calibration, operator, and repeat readings. | A reproducible measurement definition versus an unspecified “size.” |
TDWG's Darwin Core vocabulary provides established terms for specimen records, geological context, identifications, and measurements. The worksheet below is a small working aid, not a complete Darwin Core export. Map it to the collection's system when sharing records.
Make a view that can support measurement
First make an overview showing the complete object and a metric scale. Add other views and close-ups to reveal relevant features, keeping the specimen ID attached to each file. The Natural History Museum of Los Angeles County's fossil documentation guide recommends complete-object photographs, a scale, several views, and measurements of length, width, and depth. Turn a fragile specimen only when it can be done safely and appropriately for that collection.
For a planar length measurement, position the camera so its sensor plane is parallel to the plane of the dimension being measured. Put the scale beside that feature at approximately the same distance from the camera. A ruler resting on the table beneath a thick specimen can give the wrong calibration for its upper surface. Use a stable camera support and enough image detail to place the measurement endpoints consistently. The Society of Vertebrate Paleontology's specimen photography tutorial (PDF, about 97 MB) specifically discusses scale placement at the level of focus.
Use lighting that reveals the edges and surface features you need without clipping pale areas to featureless white or hiding boundaries in shadow. A diffuse overview and a separate view with directional light may answer different questions. Keep the overview even when a detail photograph is more striking. Avoid altering or coating a specimen merely to improve a picture without the collection's approval.
Choose a scale with a known distance and verify a printed scale after printing: automatic page scaling can change its size. Keep the scale in the original image and calibrate each differently magnified or resized image separately. A decorative bar added without calibration provides no measurement evidence. For a strongly curved surface, a photograph gives a projection; a 2D line cannot automatically recover a 3D path length.
Convert pixels to length, then inspect the assumptions
Invented example, not a measurement of the hero illustration: a 10.0 mm section of a scale occupies 500 pixels. The defined fossil dimension occupies 1,240 pixels in the same image plane.
Scale = 10.0 ÷ 500 = 0.0200 mm per pixel.
Projected length = 1,240 × 0.0200 = 24.8 mm.
In ImageJ, draw a straight line along the known scale distance, use Analyze → Set Scale, enter its known length and units, then measure a line between the fossil's defined endpoints. Check whether a global calibration is active before applying a scale to other images. The ImageJ Analyze-menu documentation describes Set Scale and Measure. Save the calibration and measurement selections or their coordinates so someone can repeat the operation.
Suppose repeated endpoint placement gives 1,236 to 1,244 pixels while the scale calibration stays fixed. The corresponding lengths are 24.72 to 24.88 mm. That spread illustrates sensitivity to endpoint choice only. It is not a confidence interval or a complete uncertainty statement: scale accuracy, perspective, lens distortion, focus, and the definition of the feature may matter more. Extra spreadsheet decimals do not remove these effects.
Download the checked pixel-to-length example (CSV) and a specimen and image record worksheet (CSV). The example uses fictional record IDs and contains no taxonomic identification or locality claim. The worksheet includes space for calibration, view, endpoint definition, provenance, and limitations; leave unknown information explicitly unknown.
Before measuring many images, write a rule such as “maximum straight-line width in this specified view, excluding broken projections,” and test whether another person can apply it consistently. Match the definition to the research question and taxon. Do not switch between width, curved perimeter, and maximum overall extent while treating them as the same variable.
Accurate measurements can still describe a biased sample
A published illustration may accurately show the chosen specimen while the chosen specimen is unrepresentative of a collection. Krause and colleagues' 2007 study of body-size estimates from the literature compared illustrated bivalves and brachiopods with bulk-collected samples and found a bias toward larger illustrated specimens. That result supports examining selection bias; it does not supply a universal correction for every fossil group or image collection.
For your own study, distinguish the population you want to describe from the specimens you can measure. Are juveniles missing? Were damaged specimens excluded? Did a curator select especially distinctive examples? Have you counted several panels of the same specimen more than once? Record the selection rule and exclusions before summarizing a size distribution.
Keep unmodified original photographs. Make crops or contrast adjustments in derivative files and describe processing that could affect measurement or interpretation. Generative filling, sharpening that invents detail, or removal of inconvenient features can create anatomy that the specimen never supplied. AI-assisted identification may suggest comparisons to investigate, but a confident label cannot replace diagnostic features, geological context, or a specialist's examination.
Report the measured feature, image source, view, scale method, sample-selection rule, and relevant limitations with the result. When the photograph cannot support a reliable measurement, recording that limitation is more useful than publishing a precise-looking number.
Related resources
- Plan a sampling rule that answers the question
- Keep images, metadata, and analysis connected
- Distinguish evidence from an extinction claim
- Explore all science resources
Researched and updated September 6, 2026. Consult the linked primary sources for methods, evidence, and limitations.