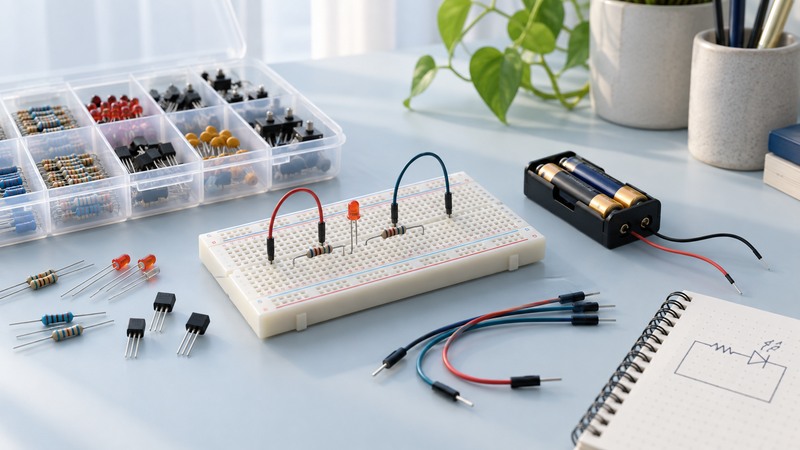
Choose an electronic project kit for the thing you want to understand or make. A good first kit gives you a reachable result, explains the connections and lets you change one part of the experiment after it works.
For a parent or teacher, also check the manufacturer’s age guidance, small-part warnings and supervision requirements. For an adult beginner, consider available time, hand tools and comfort with software. A large component count is useful only when the documentation helps you use those components.
Match the kit to a learning goal
On a narrow screen, scroll the table horizontally. Keyboard users can focus the table region and use the arrow keys.
| Kit style | A useful first goal | Check before buying |
|---|---|---|
| Snap-together | Trace a complete circuit and change a switch or component. | Clear circuit explanations, replacement parts and suitable age guidance. |
| Solderless breadboard | Connect components by circuit node and diagnose a misplaced lead. | Legible diagrams, identified components, power arrangement and a basic meter if required. |
| Soldering project | Make durable joints and assemble a small finished device. | Tools, practice material, ventilation/safety instructions and an achievable assembly sequence. |
| Programmable board | Connect code to an input or output and observe repeatable behavior. | Supported computer/OS, data cable, board version, software setup and downloadable examples. |
An accessory bundle may omit the controller. For example, Arduino’s Workshop Kit listing explicitly identifies its contents and says the UNO Rev3 board is separate. Check the exact package rather than assuming that every “starter” or “workshop” name includes the same hardware.
For a classroom, count complete workstations, not just learners. Include power arrangements, spare LEDs and resistors, labeled storage and time to reset each activity. Pairing learners works best when both take turns wiring, predicting and explaining the result.
Make the first session small enough to finish
Read the complete first exercise before opening every bag. Lay out only its parts and identify each value or part number. Keep the project book’s board revision and the actual board together; pin names and electrical limits can differ between families.
For a programmable kit, first run the documented built-in LED example with the supplied board and a data-capable cable. This checks the software connection separately from external wiring. Then move to the documented external circuit. Arduino’s Starter Kit R4 documentation is one example of a kit-specific starting point.
For breadboards, understand which holes share a metal strip. The center gap separates the two sides, and power rails may be split along their length. Adafruit’s breadboard guide illustrates how a simple battery, resistor and LED circuit maps onto connected rows. Verify your own board’s layout before relying on a colored stripe.
A first build with an observable result
Use the kit’s documented low-voltage LED-and-resistor exercise, its specified power source and its specified component values. The learning target is to explain the complete current path and make one controlled change. The following sequence complements the project instructions; the photograph above is a component illustration.
- With power disconnected, identify the LED polarity from its documentation and confirm the resistor value. Sketch the series path: supply, resistor, LED, return. The resistor can sit on either side of the LED in this simple series circuit.
- Translate each connection into a breadboard node. Keep the LED’s two leads in separate nodes and confirm the intended rail connections.
- Compare every connection with the kit diagram. Check that supply and return are not shorted together, then apply the documented power.
- Observe whether the LED lights steadily. Disconnect power before changing a lead or component.
- Try the next resistor value allowed by the lesson. Predict the brightness change, rebuild, then compare the observation with the prediction.
For a documented demonstration of resistor changes, see Adafruit’s LED breadboard lesson. Follow that lesson’s own hardware and values if building its circuit.
Troubleshoot one layer at a time
On a narrow screen, scroll the table horizontally. Keyboard users can focus the table region and use the arrow keys.
| Symptom | First checks | What the result tells you |
|---|---|---|
| LED stays dark | Disconnect power; check polarity, resistor value and shared rows. Then verify the intended supply using the kit instructions. | A connection or power error can explain the result before software is involved. |
| LED works until the board moves | Inspect loose jumpers, shallow component leads and split power rails. | Movement-related faults usually need a physical connection check. |
| Program will not upload | Check board/port selection, data cable and the manufacturer’s setup instructions. | A built-in LED example helps separate upload problems from external wiring. |
| Unexpected warmth or odor | Disconnect power promptly and inspect against the instructions before retrying. | Reapplying power without locating the fault can damage components. |
Change one thing, record what changed and repeat the same observation. If the kit supplies a meter, use its voltage-measurement instructions first. A meter in current mode creates a very different connection; never place it across the supply as though measuring voltage.
Turn the finished build into understanding
Explain which component controls current, which node returns to the supply and what changed when you altered the resistor or code. Save a clear wiring photograph and three lines: prediction, observation and next question. A completed project is a useful beginning when you can describe why it behaves that way.
Choose a next exercise that adds one new idea, such as a pushbutton input or a sensor reading. The downloadable record includes both kit-selection questions and a short experiment log, so a second session can begin from what actually worked.
Keep a working record
Download the electronic project kits worksheet (editable text). Save a copy for each comparison or test. It includes the example assumptions, fields for source references and space for your results.