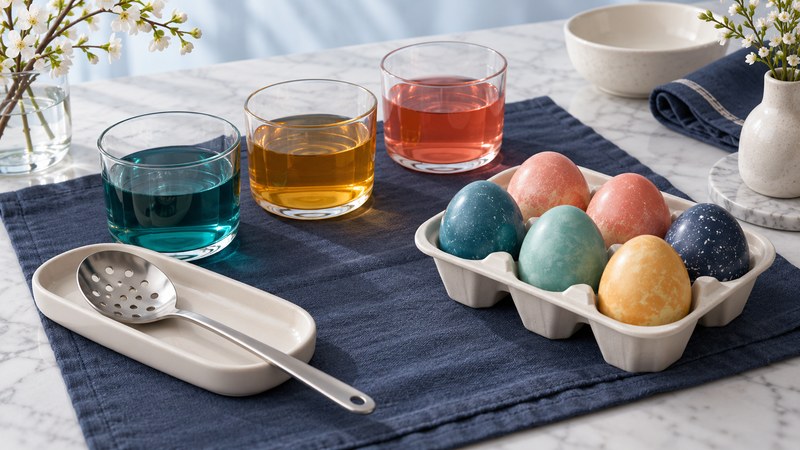
A successful egg-dyeing session starts with cooled, hard-cooked eggs, a clear work surface, and a plan for where the eggs will go afterward. Choose food-safe color for eggs you intend to eat, prepare a few dye cups, and test one egg before coloring the whole batch.
Prepare a small, manageable station
Start with three colors and one egg per person at a time. That leaves room to lift eggs without bumping neighboring cups. Set out:
- Hard-cooked eggs, completely cooled, with intact shells; keep the waiting batch refrigerated.
- A food coloring or egg-dye product labeled for the intended use, plus its instructions.
- Heat-safe cups deep enough to cover an egg, water, and vinegar if the chosen method calls for it.
- A measuring cup, measuring spoon, slotted spoon or egg holder, and a timer.
- A protected work surface, paper towels, and a clean drying rack over a tray.
- A clean, covered container for returning finished eggs to the refrigerator.
An adult should handle boiling water and hot dye cups. Give younger children the cooled eggs, color choices, and decorating decisions while an adult manages lifting and spills. Keep drinks away from the dye station so cups cannot be confused.
Cook eggs ahead of time using a dependable method, then cool and refrigerate them. USDA's hard-cooking instructions account for egg size. Firm whites and yolks are the goal; dyeing is a separate step.
Download the egg-dyeing preparation checklist (plain text). Fill in your product, batch size, and storage plan before starting.
Mix the dye, then test one egg
For a specific starting method, McCormick's liquid-food-color instructions use ½ cup boiling water, 1 teaspoon vinegar, and 10–20 drops of food color per cup. The suggested immersion time is about five minutes. Tablets, gels, and other brands may need different quantities; follow the product you actually have.
- Prepare each cup. Measure the ingredients into a heat-safe container. Stir carefully. An adult controls the hot-water step and hot cups.
- Lower one egg gently. Use a slotted spoon or holder so the egg settles without dropping onto the bottom. Set the timer.
- Check the shade. Lift the egg to judge the result. Record the product, color drops, and immersion time if you want to repeat it.
- Drain and dry. Lift the egg over its own cup, let excess dye drip off, and place it on the rack. Leave space between wet eggs.
- Repeat in small batches. Keep the method consistent for matching colors, or change one variable for an intentional experiment.
Let the design determine the handling
Single-color eggs are the easiest place to begin. Choose one shade, dip, and allow it to dry completely. For a coordinated basket, vary the intensity within two or three colors instead of mixing many unrelated shades.
Two-tone eggs need more control: hold part of the shell in one cup, dry it, then dip the other part into a second color. The overlap creates a third area of color. Let an adult manage any step involving hot cups or a slippery egg.
Decorative-only eggs can be a separate craft project. Clearly separate them from edible eggs whenever you use materials that are not labeled for food use. Use reusable imitation eggs for a hunt so the edible batch can stay refrigerated.
Use the first egg to solve common problems
| What you see | What to check | Next attempt |
|---|---|---|
| Color is lighter than expected | Product concentration, drop count, shell color, and time in the bath. | Follow the product's adjustment range and compare one test egg before changing every cup. |
| Patchy color or finger marks | Handling, surface residue, and whether the egg dried against another object. | Use clean hands and the holder; leave more drying space. |
| Colors turn muddy | A spoon or wet egg is carrying dye between cups. | Use a separate holder for each color or rinse it between colors; drain before a second dip. |
| Repeated eggs look different | Different starting shells, amounts, or immersion times. | Record those inputs and keep them consistent. Judge color after drying. |
Keep the edible batch cold
USDA's Easter-egg guidance calls for food-safe coloring, clean hands, and returning dyed hard-cooked eggs to refrigeration within two hours. Store at 40°F or below and use within one week of cooking. Track the time spent decorating and serving; putting eggs back briefly does not undo time already spent warm. USDA advises against eating hard-cooked eggs used in hiding or play.
For an outdoor activity above 90°F, the limit for perishable food outside temperature control is one hour, according to USDA's time-and-temperature guidance. Discard eggs that exceed the applicable limit.
Planning the meal too? See how to organize a honey-baked ham dinner, or explore the Holidays guides.