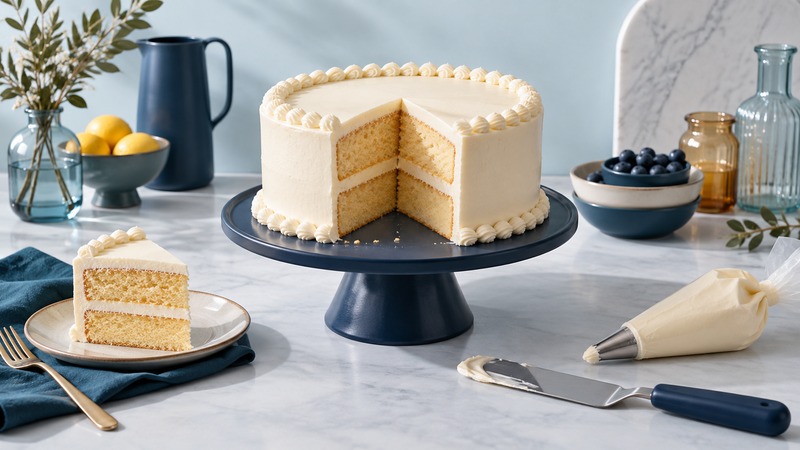
Begin with two fully baked, completely cooled 8-inch round cake layers, each about 1½–2 inches tall. This guide covers assembling and finishing that cake with the same buttercream between the layers and on the outside. It assumes the cake is already baked; use a complete recipe written for your pans.
Set up before opening the frosting
Have a flat serving board or plate wider than the cake, a serrated knife, an offset spatula, a scraper or straight spatula, a small bowl and optionally a piping bag. A turntable helps but is optional. Clear refrigerator space wide and tall enough for the assembled cake.
Plan about 4–4½ cups frosting for a modest finish and a small border. Deep piping, tall layers and thick filling need more. Set aside roughly ¾ cup for filling, ½ cup for the crumb coat, 2½ cups for the outside and ½ cup for a simple border: 4¼ cups total. These are planning allowances, not a guaranteed yield for every cake.
Make a simple spreading buttercream
For about 4⅛ cups, scale King Arthur’s easy vanilla buttercream by 1½: 128 g softened unsalted butter, 90 g vegetable shortening, a scant ¼ teaspoon salt, 681–850 g sifted confectioners’ sugar, 3 teaspoons vanilla and 85–117 g room-temperature milk or cream.
Beat the fats and salt until fluffy. On low speed, incorporate half the sugar; then add vanilla and half the liquid. Alternate the remaining sugar and liquid gradually until it spreads smoothly, then beat until light. Start at the low end of the liquid range. A spatula should move it without pulling the cake’s surface.
The source yields approximately 2¾ cups; multiplying by 1½ gives 4⅛, close to the planning amount. Keep the border modest if less remains. Yenra has not kitchen-tested this scaled batch.
Level and fill
- Trim any domed top with a serrated knife, keeping the blade level. Work on a stable surface and move the cake rather than reaching around it.
- Use a dab of frosting to anchor the first layer. Spread about ¾ cup filling evenly, checking thickness at the edge.
- Place the second layer with its flat baked bottom facing upward. Look from several sides and adjust alignment before coating.
For this first project, use buttercream alone between layers. A fruit or custard filling needs its own amount, containment and storage plan. A large mound of filling creates a slippery joint that extra exterior frosting cannot reliably fix.
Crumb-coat, chill and finish
Put the crumb-coat allowance in a separate bowl. Spread a very thin layer over the top and sides; visible crumbs and cake are expected. Keep crumb-filled scrapings out of the clean frosting. Wilton’s crumb-coating guide explains this first layer’s role in trapping loose crumbs.
Chill about 15–20 minutes, then touch a small spot gently to check that the coating is firm. Add fresh frosting to the top and sides. Rotate the plate while holding a scraper lightly against the side; wipe it between passes. Draw the ridge at the top inward. These stages follow King Arthur’s illustrated cake assembly method.
Practice a few dots or short shells on a plate before piping the border. Fill the bag only partway, twist its top and squeeze steadily; stop pressure before lifting. A simple repeated shape looks more deliberate than several unpracticed patterns.
Fix the cause and plan storage
Crumbs in the final coat: let the first coat firm and clean the tool. Layers slide: stop, chill and check whether filling is too thick or frosting too soft. Frosting tears the cake: soften a small bowl with a few drops of liquid, then test. Bulge at the middle: check alignment and filling quantity before disguising it with more frosting.
For this milk-containing frosting, keep the completed cake covered in the refrigerator and bring out only what you need for serving. Follow the cake recipe’s storage limit and any more restrictive filling requirement. FDA’s cold-storage guidance gives 40°F or below and a two-hour room-temperature limit for perishables, shortened to one hour above 90°F.
Bake and cool layers one day, then assemble and chill the next if that makes the work easier. Store layers as their recipe directs. For a different dessert project, try a small baked cheesecake or measured chocolate-chip cookies.